Irelia Blade Dancer Deck Guide – Riftbound TCG

Heya everyone! Calm Chaos Irelia has been one of the strongest decks in the Spiritforged meta. While it heavily relies on Irelia Fervent as its main win condition, the deck still has plenty of other tools up its sleeve to create winning board states.
This deck isn’t easy to pilot. Getting the most out of it means understanding your matchups and knowing exactly what your opponent’s deck is capable of. A lot of the time, you’ll be leaning on one or two key units to close out the game, so protecting them with your many low-cost spells becomes the core of your strategy. On top of that, managing how many Runes you keep available in each matchup is crucial if you want to push this deck to the next level.
In this guide, we’ll break down the Green Purple Irelia deck—its main game plan, the key units you’re trying to protect, and how each card works together to make the deck tick.
Legend

Irelia Blade Dancer’s effect lets you Ready a unit you’ve chosen. You have to exhaust your Legend and pay 1 Power (either Chaos or Calm) to activate the ability. Our list is full of cards that let us choose a unit, so we can consistently activate this ability to Ready a unit, allowing us to make a move either offensively or defensively.
If we conquer a battlefield, we can Ready Irelia Blade Dancer by paying 1 Energy. This might come in handy in the late-game when we need to go for multiple moves, either setting up multiple attacks or going in for an attack and retreating to the safety of our base.
Decklist
Irelia, Blade Dancer
1
0
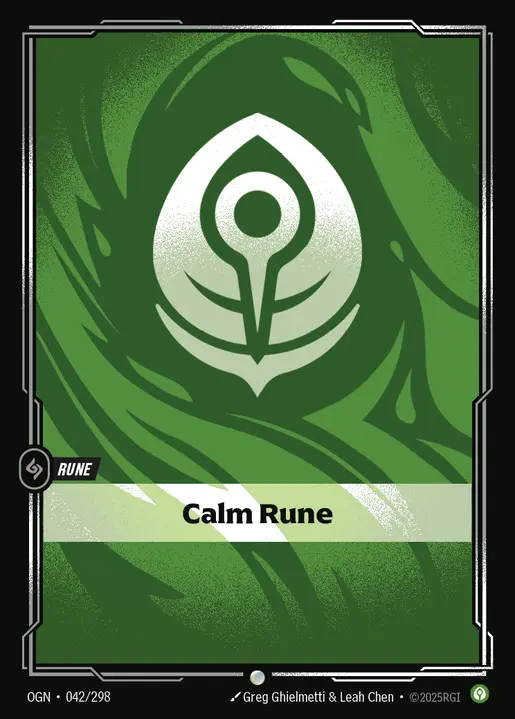 Calm Rune
6
0
Calm Rune
6
0
 Chaos Rune
6
0
Chaos Rune
6
0
 Obelisk of Power
1
0
Obelisk of Power
1
0
 The Dreaming Tree
1
0
The Dreaming Tree
1
0
 Sunken Temple
1
0
Sunken Temple
1
0
 Charm
3
Charm
3
 Defiant Dance
3
Defiant Dance
3
 Defy
2
Defy
2
 En Garde
3
1
En Garde
3
1
 Gust
1
1
Gust
1
1
 Discipline
3
2
Discipline
3
2
 Fight or Flight
2
2
Fight or Flight
2
2
 Flash
1
2
Flash
1
2
 Guardian Angel
3
2
Guardian Angel
3
2
 Lonely Poro
2
2
Lonely Poro
2
2
 Not So Fast
3
Not So Fast
3
 Rebuke
1
Rebuke
1
 Ride the Wind
3
Ride the Wind
3
 The Syren
1
2
The Syren
1
2
 Tideturner
3
2
Tideturner
3
2
 Boots of Swiftness
1
3
Boots of Swiftness
1
3
 Stellacorn Herder
2
4
Stellacorn Herder
2
4
 Irelia, Fervent
1
5
Irelia, Fervent
1
5
 Draven, Audacious
2
Draven, Audacious
2
 Sneaky Deckhand
3
3
Sneaky Deckhand
3
3
 Adaptatron
2
4
Defy
1
Stellacorn Herder
1
4
Adaptatron
2
4
Defy
1
Stellacorn Herder
1
4
 Hard Bargain
1
2
Hard Bargain
1
2
How to Play
Champion
Irelia Fervent is the main win condition in this deck, and since she’s in our champion slot, we’ll always have her available to drop on the board and start presenting her as a threat. Irelia Fervent is a 5-cost, 4 Might unit that gains +1 Might for the turn whenever she’s chosen or becomes Ready. This enables her to conquer and hold battlefields much more easily, making it harder for the opposing player to kill her.
Cards like will give Irelia an additional Might, helping you win against higher Might units and forcing more resources from the opposing player.
The deflect keyword on Irelia Fervent will make opponents think twice before targeting her, as the Power recycle cost can be taxing, especially if their card gets shut down by one of our protection spells.
Since Irelia Fervent plays a major role in this deck, we want to keep protecting her as long as possible, and refrain from putting her in a risky spot unless we’re forced to. Having Ready Runes during the opponent’s turn is important to protect her and continue swinging with her to clear the battlefield and score points.
Battlefields

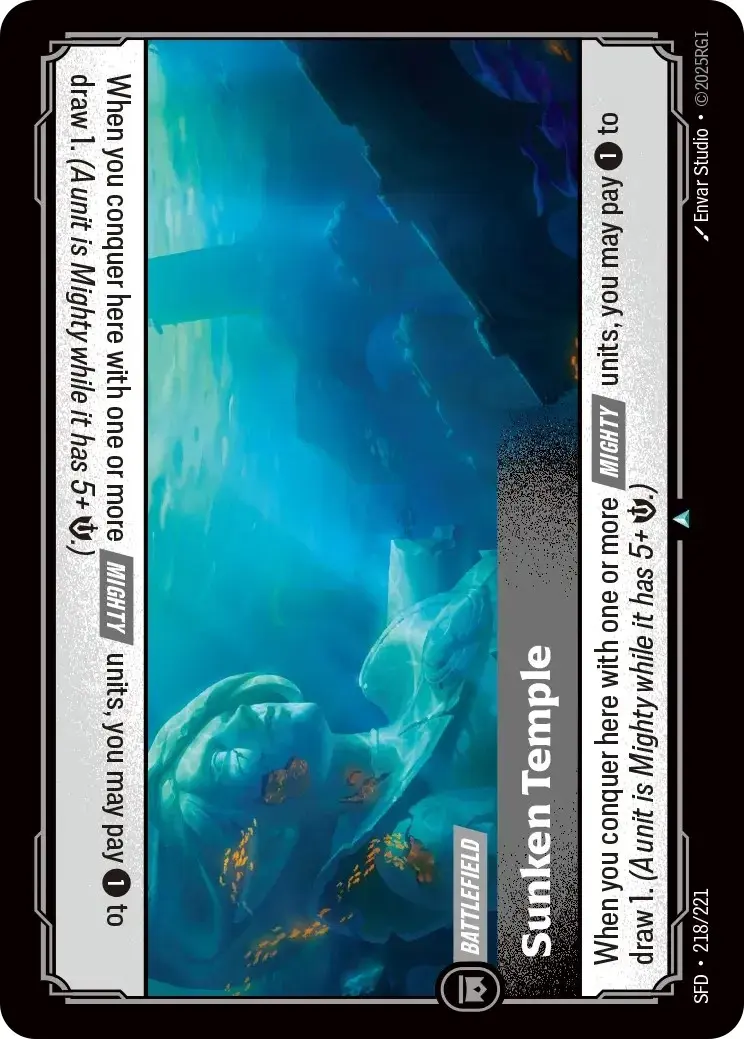

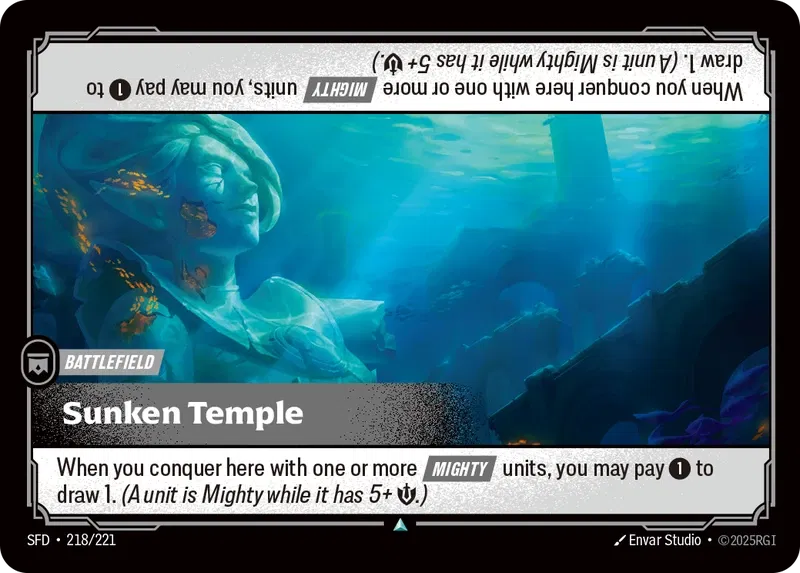
When going blind (first game), Sunken Temple is our usual pick, offering a draw when we conquer it with a Mighty unit. Since at the start of our turn, Irelia becomes Ready and gains +1 Might, she’s already a Mighty unit, capable of taking advantage of Sunken Temple. However, we need to pay 1 Energy for the draw, so be mindful of how many Runes you still have left and what your opponent is capable of on the upcoming turn.
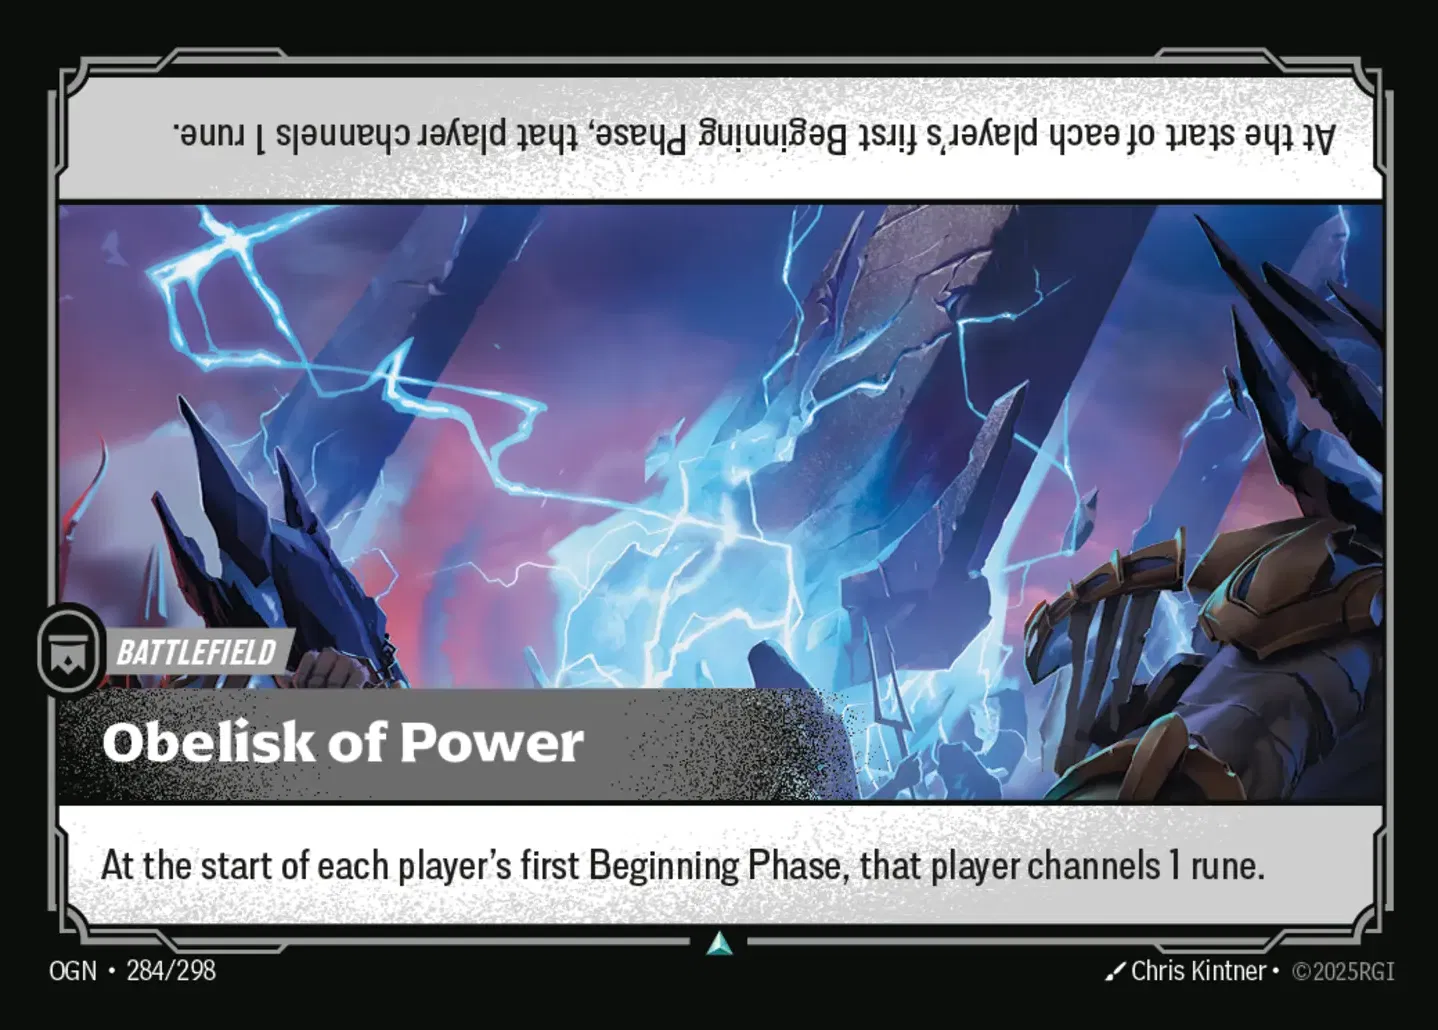
As for Obelisk of Power, we’ll want to pick this when we’re going first, giving us the additional Rune to speed things up and catch up to the opposing player. Since we don’t have the means for additional draws with this battlefield, we need to be more careful with our resources, and Stellacorn Herder can be great for the draws. The extra rune from Obelisk lets us develop Irelia on turn 2, setting her up as early as possible.
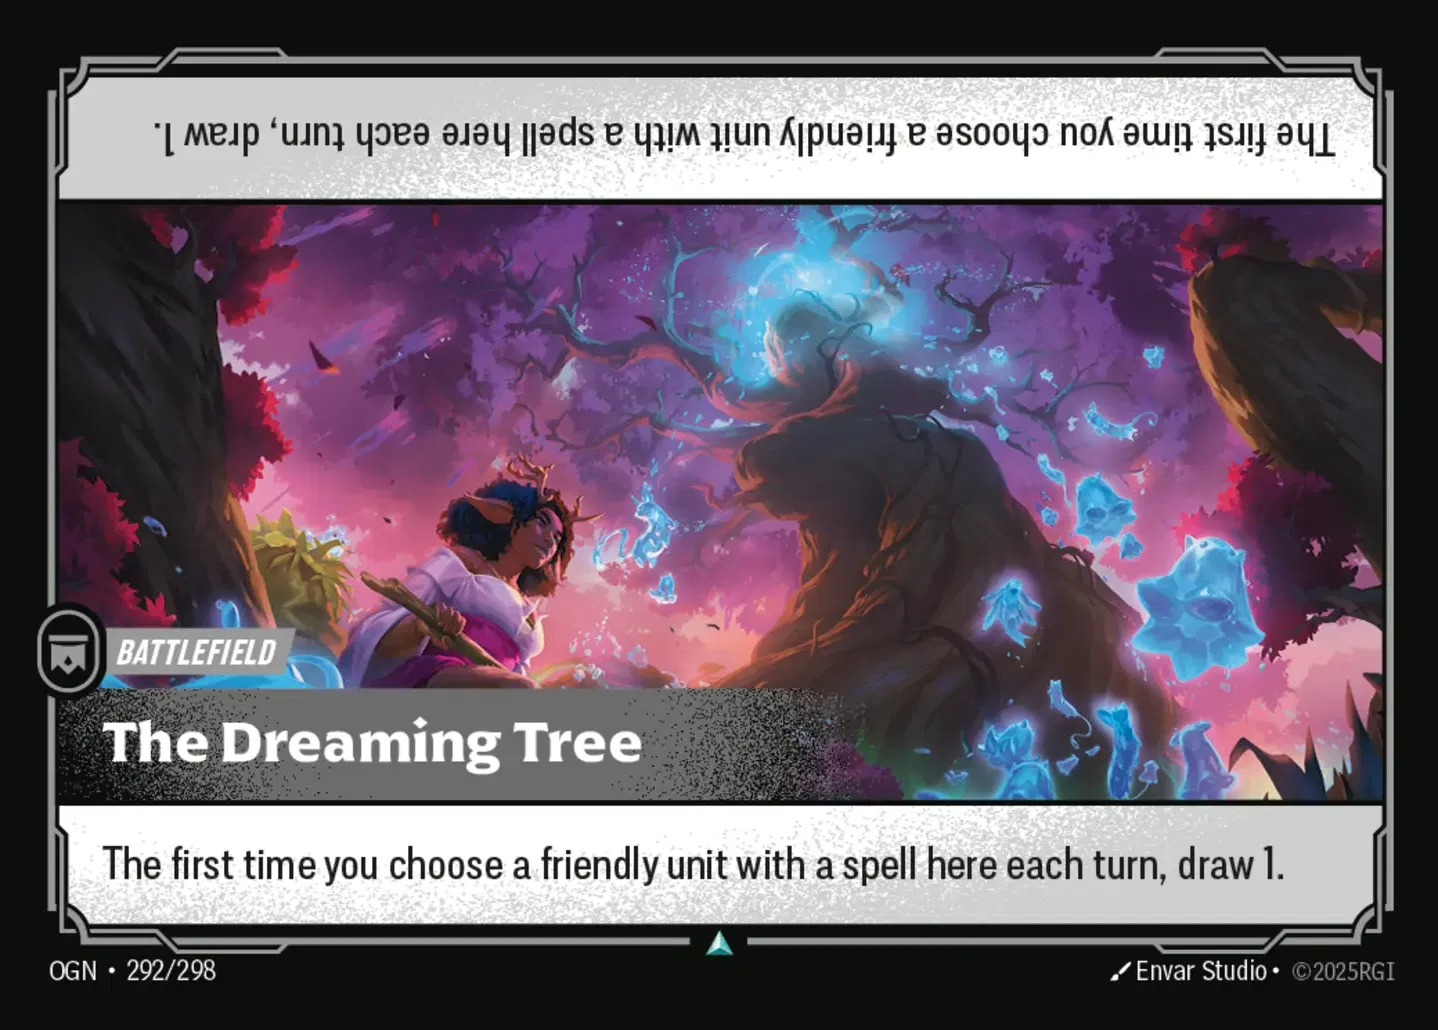
The Dreaming Tree is our pick for second as it heavily synergizes with our deck, and we don’t need to conquer it to take advantage of it. It gives us a massive advantage over the opponent (if they don’t run too many friendly unit target spells). Since most of our deck consists of low-cost spells, getting access to more draws will make sure we don’t fall behind in the late-game and can still set up a strong finisher. Whenever possible, we want to move our units to The Dreaming Tree and choose it with a spell to get the card draw.
Early Units
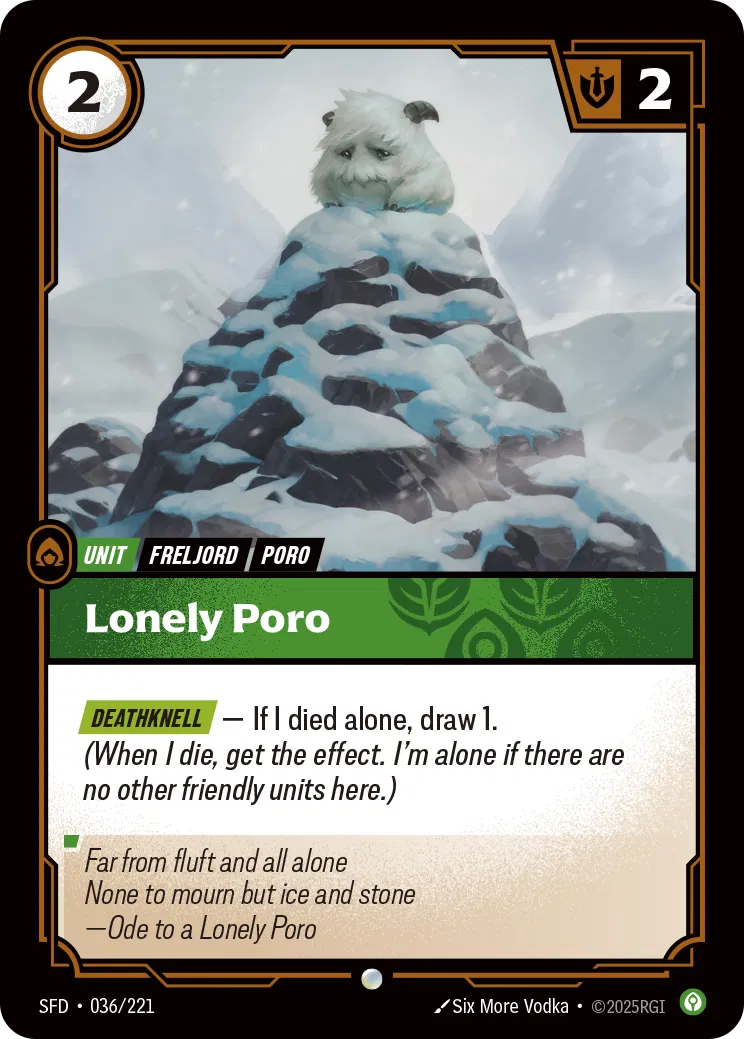
Lonely Poro is an excellent early-game play, especially against fast-paced decks. He can score early points, trade with a low-Might unit, and if he’s the only unit on your side of the battlefield when he dies, he replaces himself by drawing you a card.
Tideturner can also come down early to contest the board if we don’t have anything else to develop. Most of the time, though, we’ll be using Tideturner for his swap effect, which opens up some really interesting lines depending on the game state.
If we have an exhausted unit sitting at a battlefield and want to get it out of danger, Tideturner can swap with it, moving that unit to a safer position and making it much harder for the opponent to deal with.
On the flip side, if we have a Ready unit at a battlefield that we want to use to pressure another one, Tideturner can swap with it, sending that unit back to base. From there, we can move and attack a different battlefield in the same turn. Don’t forget that Tideturner also has the Hidden keyword, so in certain situations, hiding him on a battlefield can be very relevant for disrupting the opponent’s turn.
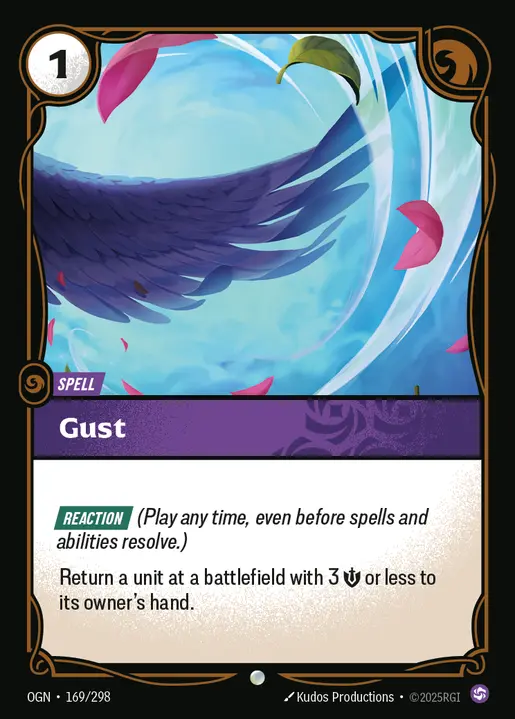
Stellacorn Herder is our strongest resource-value engine, especially if we can keep her alive for multiple turns. Every time Stellacorn Herder moves, we draw a card, which quickly snowballs our hand size and forces the opponent to answer her as soon as possible. Because of this, we’ll actively look to make as many moves with her as we can to maximize value. Cards like The Syren, Tideturner, Flash, and Fight or Flight become even stronger here, as they all move Stellacorn Herder and immediately replace themselves with a draw.
Equipment
Guardian Angel is one of our strongest defensive tools, and we’ll often attach it to Irelia Fervent to make her much harder for the opponent to deal with. When a unit with Guardian Angel would be killed, the equipment is destroyed instead, your unit is recalled, and it gets healed. On top of that, Guardian Angel gives Irelia +1 Might, and on the turn we attach it, we’re effectively gaining another Might plus the option to Ready her with our Legend ability. We only go for the Legend ability when it’s necessary, though, since recycling Runes can be costly, especially in the early game.
Guardian Angel is also a solid early-game development when we don’t have a unit to play or don’t need to commit one yet. It sets us up perfectly for the Irelia turn, letting us attach it right away. With Guardian Angel acting as a built-in safety net, we can take lines that would normally be too risky and play much more aggressively when needed.
There are situations where we’ll attach Guardian Angel to other units, like Stellacorn Herder or Draven Audacious, depending on the game state and whether protecting those units is more important at the time.
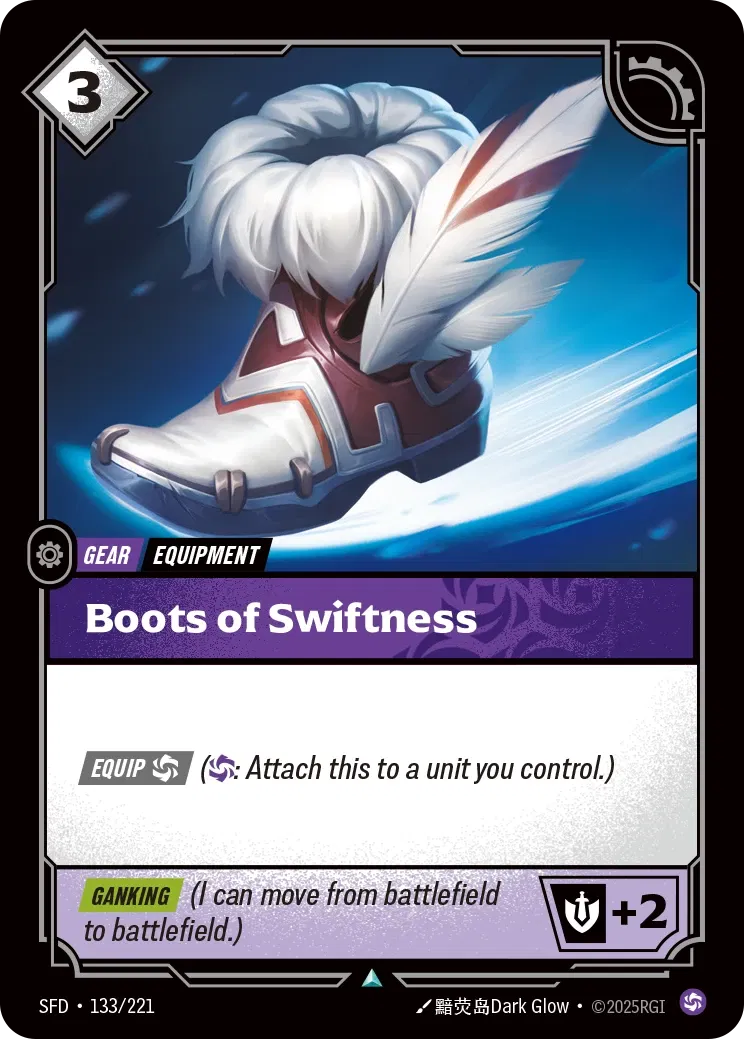
Boots of Swiftness gives a unit +2 Might and the Ganking keyword, making it ideal for jumping between battlefields and scoring points. The extra Might is huge throughout the game, as it forces the opponent to commit more resources just to remove your unit.
Might Boost Spells
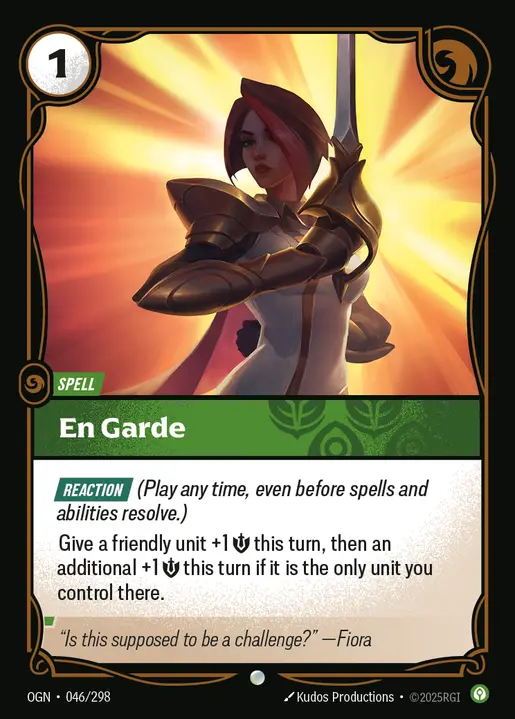
En Garde is a low-cost spell that boosts a unit’s Might. It gives +1 Might, and if that unit is the only one you control at its location, En Garde grants an additional +1 Might, making it an efficient way to win trades.
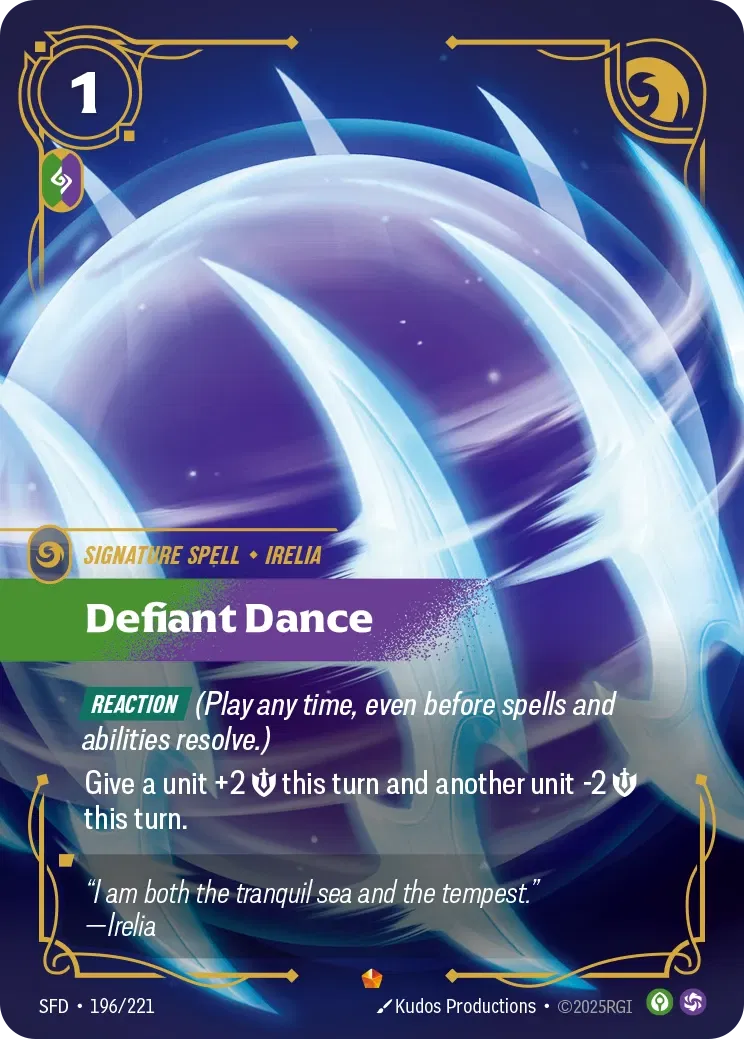
Defiant Dance is our strongest combat trick when it comes to winning trades. It gives one of our units +2 Might while reducing an opposing unit’s Might by 2. For just 1 Energy and 1 Power, we’re swinging combat heavily in our favor and often completely flipping the outcome.
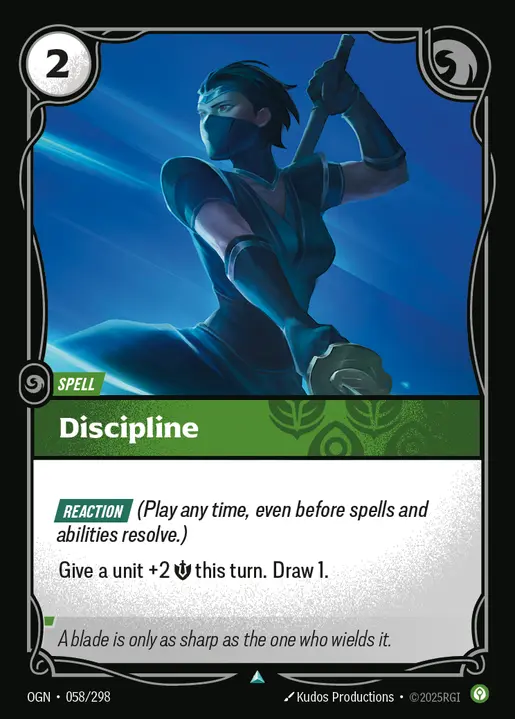
Lastly, Discipline is a 2-cost spell that gives +2 Might. At first glance, it may look weaker than En Garde or Defiant Dance, but the card draw is what makes it valuable. It adds a card resource to our hand, which in the later game will be extremely critical for setting up meaningful plays.
Control Spells
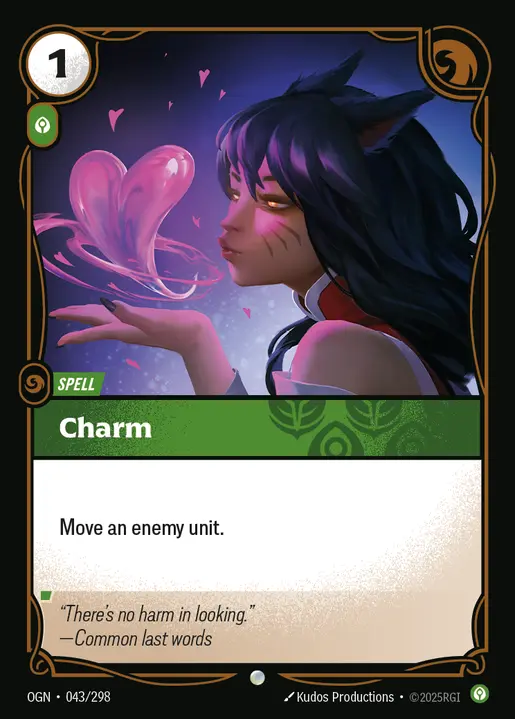
Charm is a low-cost spell that lets us move an enemy unit to a battlefield or base. This can be used offensively to move the opponent’s unit to a battlefield we control with a strong unit, forcing an unfavored combat for the opponent and possibly losing their unit. Other times, we might move an enemy unit off a battlefield, making it easier for us to attack and conquer.
Fight or Flight is one of your strongest control tools, letting us either remove one of the opponent’s units from a battlefield or bounce our own unit to save it from attackers or, in some cases, removal spells. When played, you choose a unit at a battlefield and move it back to base. Fight or Flight can also help us win combat by returning one of the opponent’s attackers to base, weakening their overall push.
It’s an Action spell with the Hidden keyword. This means you can’t use it as a direct response to a removal spell or ability that specifically targets a battlefield. However, when played Hidden, you can use it at Reaction speed to protect your unit.
You do have to recycle a Rune to play it Hidden, but skipping the 2 Energy cost and potentially playing around removal like Hidden Blade can often prevent you from falling behind on board.
Fight or Flight can also be used aggressively in the right spots. If you have a unit at a battlefield, you can return it to base, then attack another battlefield (if the unit is already Ready, you can go for an immediate attack or else use your Legend ability to Ready your unit). This can swing the game, pick off opposing units, and score you a point.
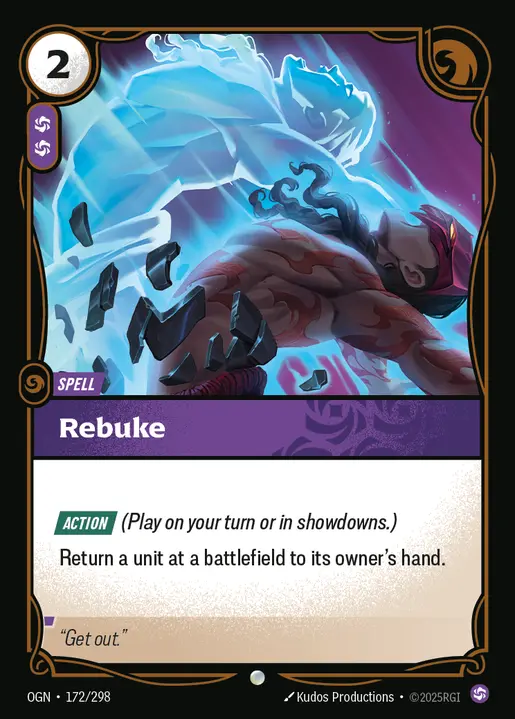
As for Rebuke, it’s a 2 Energy, 2 Chaos Power Action spell that returns a unit at a battlefield to its owner’s hand. This puts your opponent behind on tempo by removing a key unit they rely on to pressure the board, forcing them to spend Energy to replay it. The result is a massive slowdown, making it much harder for them to catch up.
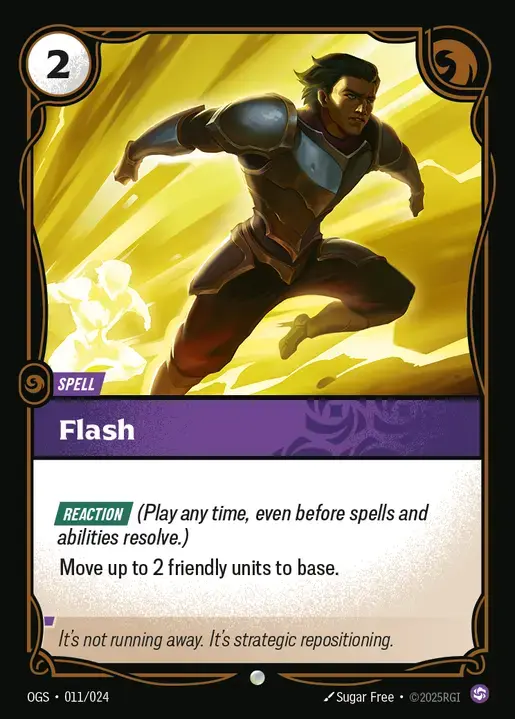
Flash will mainly be used to save our key units from getting killed on a battlefield, and since it’s a Reaction speed spell, it can be a response to spells that target only the battlefield, such as Rebuke, allowing you to dodge them. Flash can also be used aggressively, moving your unit to base and attacking the other battlefield with it.
Counter Spells
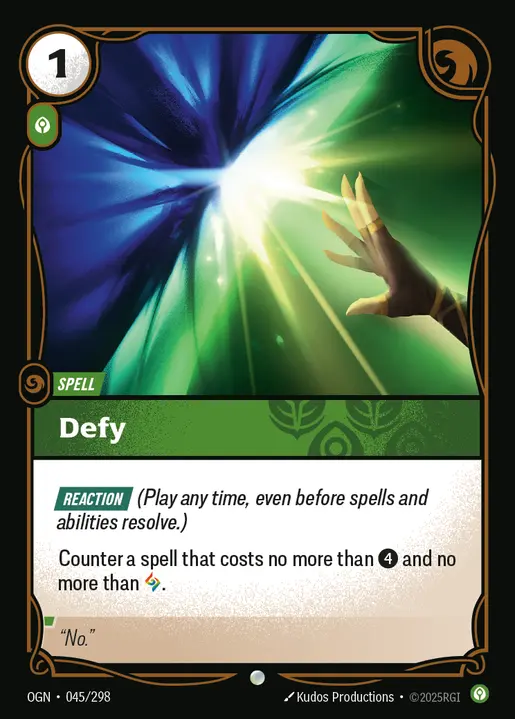
Defy is perfect for countering a 4-cost or less spell with a Power cost of 1 or less. It’s a clean way to protect our key units while also disrupting the opponent’s game plan.
Not So Fast fills a similar role but with different conditions. It doesn’t care about the Energy or Power cost of the spell being played, as long as that spell is targeting one of your units. On top of that, Not So Fast can also counter abilities that target your unit. This makes it especially useful against cards like Beast Below, where you can shut down the effect entirely and keep your unit safe.
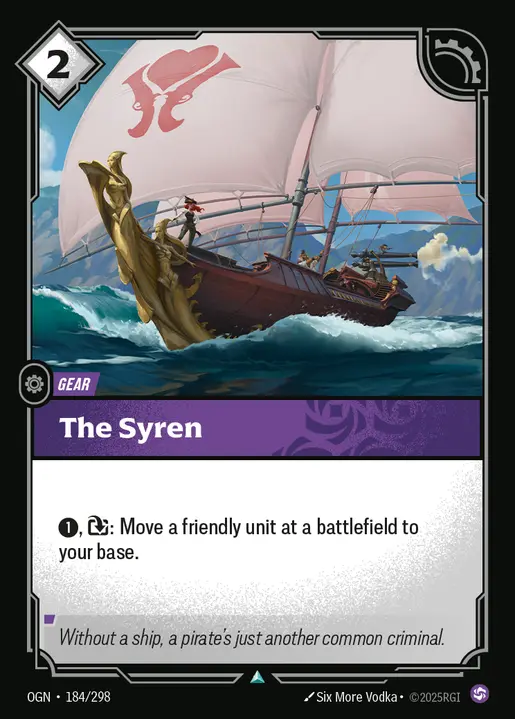
Syren
The Syren can move a unit from a battlefield to base, moving it to safety, and can be used to create aggressive turns. Instead of using our unit’s move, we can use The Syren instead, letting us attack the other battlefield with our unit, score a point, and potentially clear out the opponent’s units. The Syren also synergizes with your Legend, Irelia Fevernt, and Stellacorn Herder.
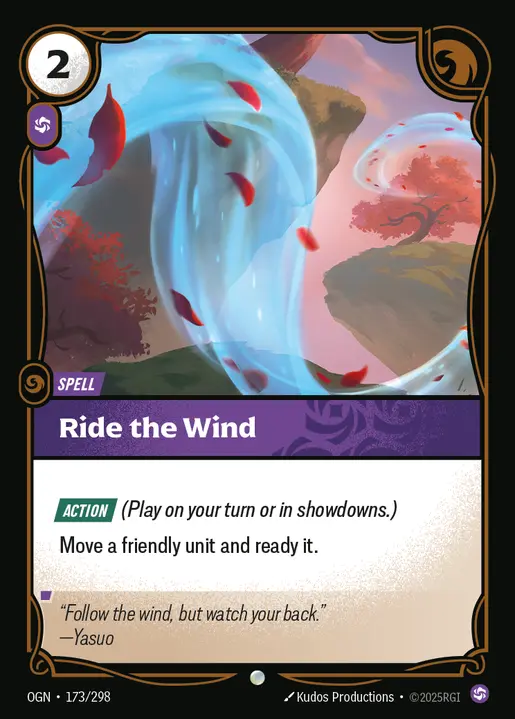
Ride The Wind
Ride the Wind is how we make an unexpected move to catch opponents off guard. Ride the Wind lets us move a unit and Ready it, allowing us to attack another battlefield or even send a key unit out of harm’s way. Since it’s Readying our unit, if played on Irelia, we’re gaining an additional +1 Might if Irelia was rested.
During the opponent’s turn, we can use Ride the Wind to attack another battlefield and conquer it, getting an additional point and potentially winning the game. If we’re at 6 Points and we Ride the Wind during the opponent’s turn and manage to conquer a battlefield, we’re now at 7 Points and about to win the game by holding.
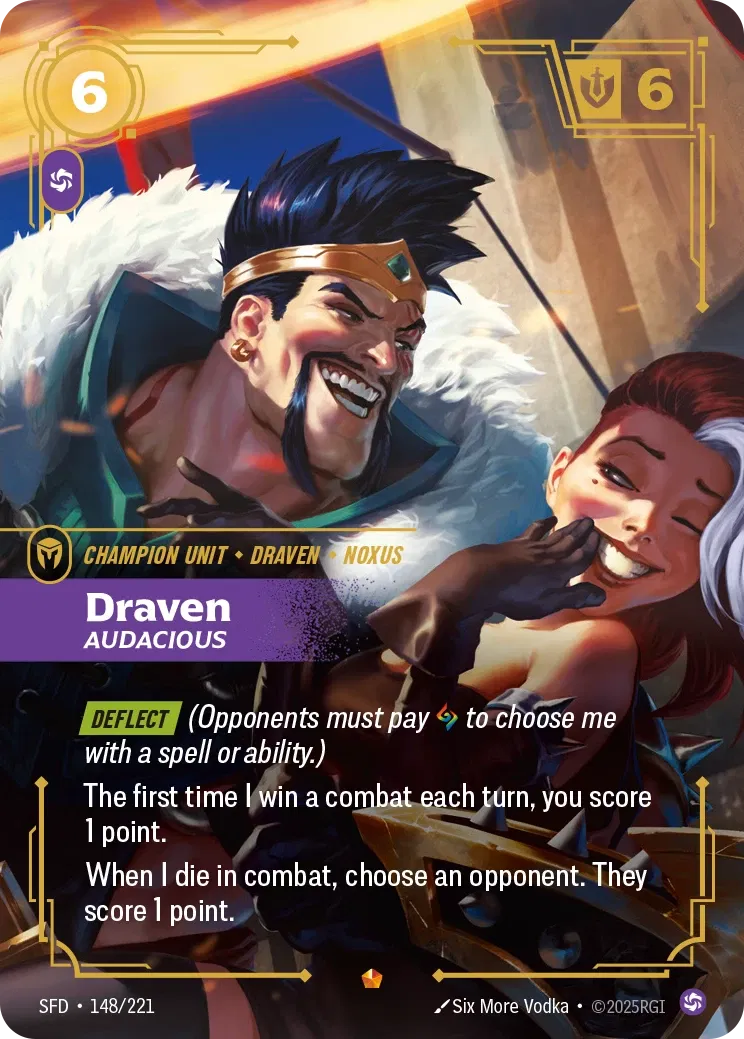
Alternate Win Condition
Draven Audacious is a potential win condition, especially in slow matchups. If Draven Audacious wins a combat, you get to gain a Point from him, accelerating your goal to 8 Points. Keep in mind that if you’re at 6 Points and haven’t conquered both battlefields, you can’t win the game through Draven’s +1 Point score ability. If Draven wins a combat while you’re at 6 Points, you will first trigger his ability to push you to 7 Points, and then the battlefield conquer will get you the other point, so if you haven’t conquered or held the other battlefield, you’ll get a card draw instead.
If Draven dies in combat, you will be giving your opponent 1 Point, but if you have Guardian Angel attached to him, you can dodge the drawback.
General Tips
- Keep Runes Ready on defensive turns. We need to always protect our Irelia, especially if she’s on a battlefield. Tapping out of Energy by developing more units will signal to our opponent that we don’t have too many plays to make to defend her.
- Use your Legend ability offensively. Since our Legend can Ready a chosen unit, Irelia will gain a +1 Might boost from that. Even during defensive turns, sometimes, we’ll opt to pay the Power cost for the extra +1 Might to help us hold a battlefield or keep our Irelia alive.
- Understand when to give up. With Guardian Angel protecting Irelia (or another unit) from getting killed, sometimes, committing too many resources from hand to protect the unit is not worth it. Instead, we can give up on protecting a battlefield/unit and have Guardian Angel killed instead, saving our resources for other plays.
Other Cards to Include/Sideboard
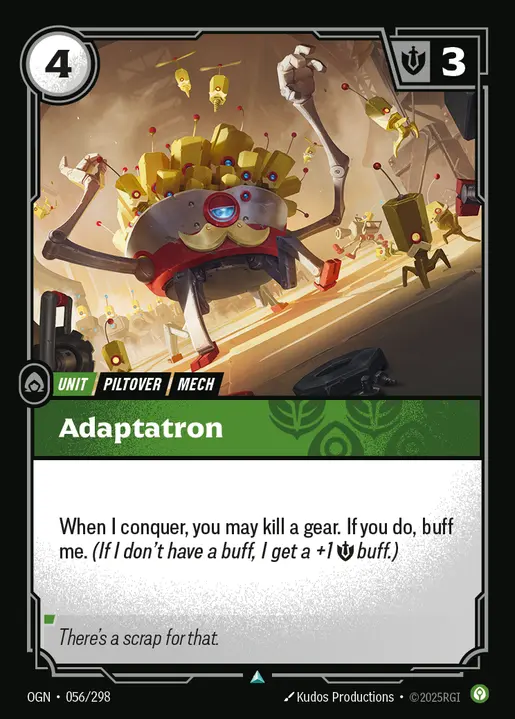
- Adaptatron is matchup-specific against decks that heavily rely on gears as part of their game plan. Managing to conquer a battlefield with Adaptatron means you get to kill one of the opponent’s gears and gain a buff on Adaptatron.
- Hard Bargain is an answer for high-cost spells that don’t target your units. In this case, Defy and Not So Fast are useless, so teching in Hard Bargain is a consideration.
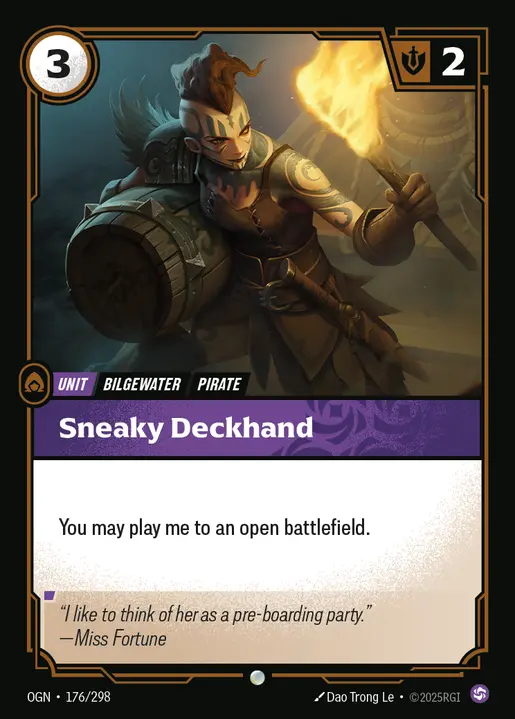
- Sneaky Deckhand is a consideration to add if you want to go faster, having a unit that can be played directly on a battlefield to conquer it and get you a point.
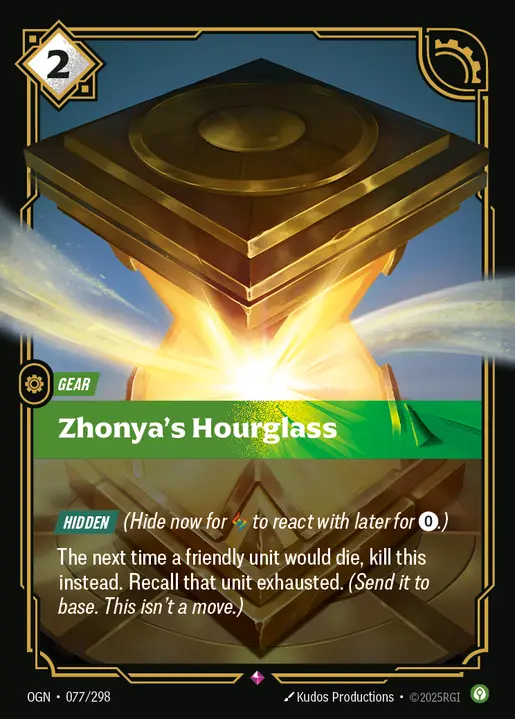

- Zhonya’s Hourglass acts similarly to Guardian Angel, protecting one of your units from getting killed. Zhonya’s Hourglass has its advantages, as you don’t have to recycle a rune and attach it to Irelia to protect her. However, you lose the Might boost that Guardian Angel provides.
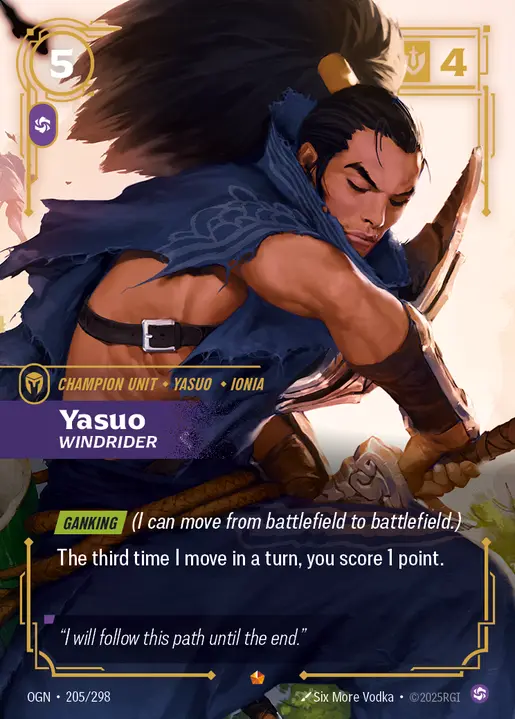
- Yasuo Windrider is an alternate win condition, getting you an extra point if you move him 3 times. This shouldn’t be too hard for the Irelia deck as you run multiple cards that let you move units along with your Legend ability. Yasuo Windrider is usually the winning play if you can’t score two battlefields in one turn.
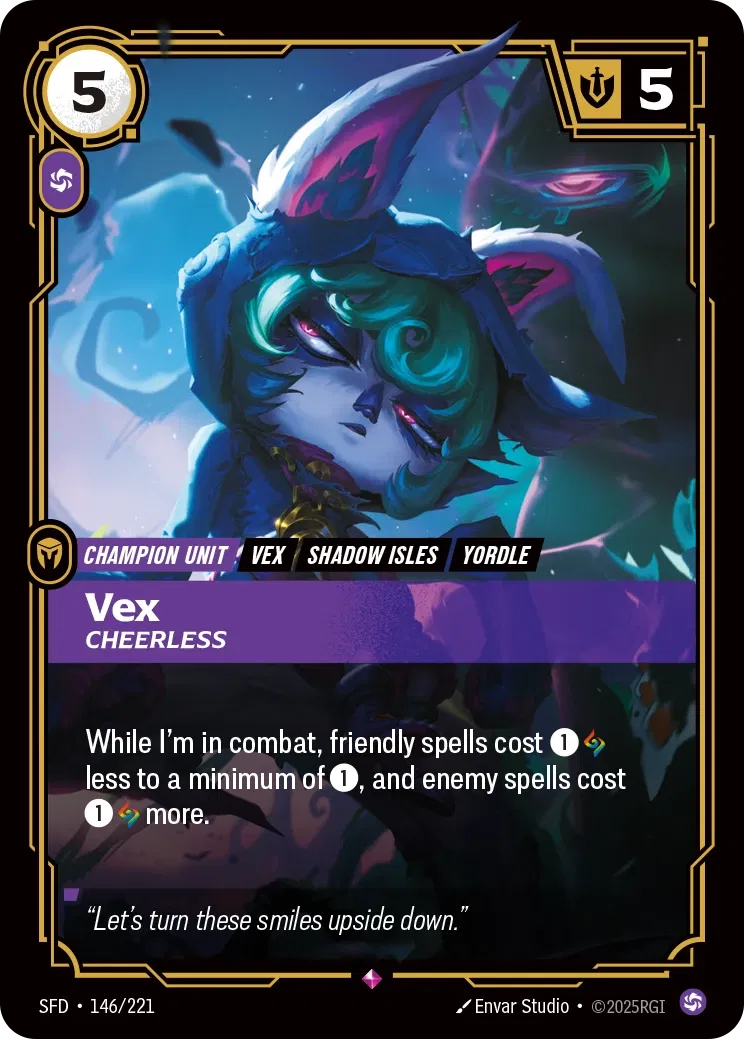
- Vex Cheerless can be extremely annoying when in combat, making it harder for the opposing player to interact to win the trade. She’s especially strong against decks that want to play multiple cards during their turn, preventing them from interacting as much.
- Seal of Focus can be in your main deck if you want to save up on your Green runes, making it less taxing to activate your Legend ability without struggling in the later stages of the game.
Closing Words
The Calm Chaos Irelia deck can be tough to master, especially since you’re often relying on one or two key units, and protecting them is a core part of the game plan. The more you play the deck and learn the different matchups, the better you’ll understand how far you can push your plays without putting your win condition at too much risk.
That said, like with any deck, there will be situations where playing it safe is no longer an option. In those moments, you’ll have to take the big risk and hope it pays off.