Draven Glorious Executioner Deck Guide – Riftbound TCG


Heya everyone! Red Purple Draven, Glorious Executioner has been crushing the competitive Riftbound scene in the Spiritforged meta, forcing players to tech specifically for him and build their tournament game plans around beating Draven. The deck thrives in combat, aiming to win fights to trigger your Legend’s ability and keep the cards flowing.
Right now, there are a few Draven builds floating around, but two versions stand out. The first is the standard midrange list, using equipment to boost your units’ Might and dominate combat. The second is Miracle Draven, a more combo-focused build that heavily relies on Ezreal Prodigy, Rhasa the Sunderer, and Battering Ram to set up explosive turns where you flood the board with low-cost units and overwhelm your opponent.
This guide will cover both Draven decklists, going over the more popular midrange build built around Spinning Axe, as well as the Miracle Draven version for players interested in that playstyle.
Legend
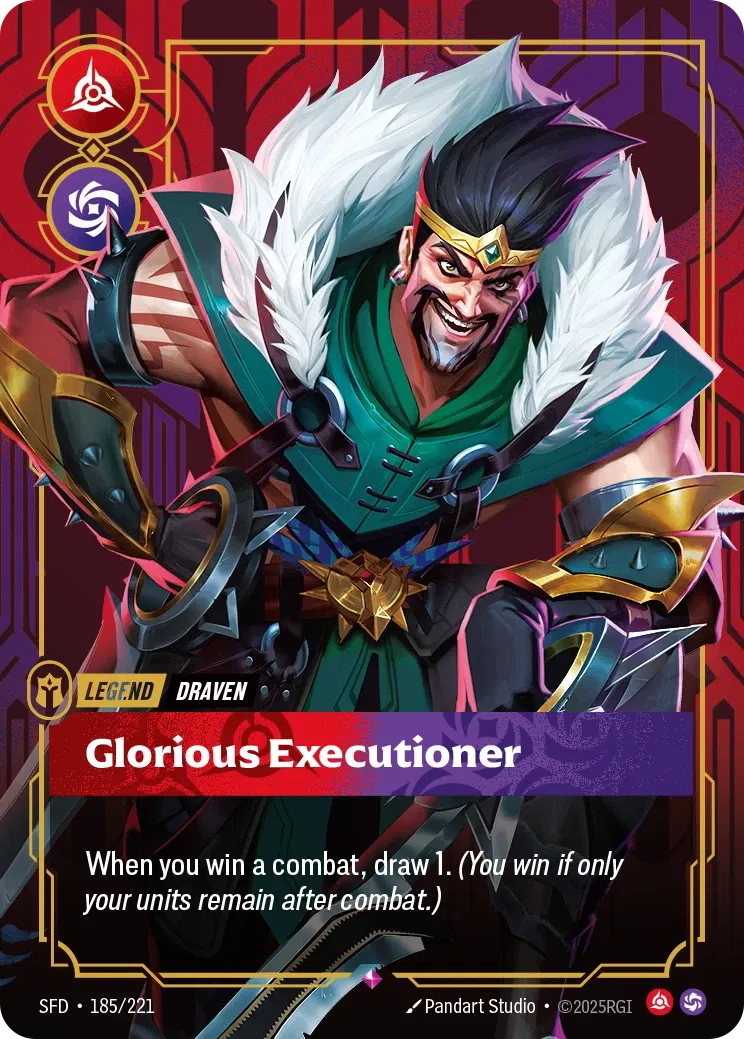
Draven, Glorious Executioner loves going into combats, drawing you a card whenever you win them! This ability is automatic; you don’t have to exhaust your Legend to activate it, and it’s not limited to a “once per turn” restriction. This means we can get multiple draws on one turn through our Legend ability, and winning a combat doesn’t necessarily mean we need to kill the opponent’s units.
Technically, a combat starts if you attack an occupied battlefield. If you manage to kill the opponent’s units and keep one of your units alive, you win the combat. However, cards like Fight or Flight can force the opponent’s unit out of the battlefield, and if your unit is attacking when this happens, you are considered the combat winner, earning you a draw from your Legend!
Midrange Draven Decklist
Draven, Glorious Executioner
1
0
 Fury Rune
6
0
Fury Rune
6
0
 Chaos Rune
6
0
Chaos Rune
6
0
 Reaver's Row
1
0
Reaver's Row
1
0
 Targon's Peak
1
0
Targon's Peak
1
0
 Treasure Hoard
1
0
Treasure Hoard
1
0
 Cleave
1
1
Cleave
1
1
 Stacked Deck
3
1
Stacked Deck
3
1
 Falling Star
2
Falling Star
2
 2
2
 Fight or Flight
3
2
Fight or Flight
3
2
 Hard Bargain
1
2
Hard Bargain
1
2
 Long Sword
2
2
Long Sword
2
2
 Overzealous Fan
3
2
Overzealous Fan
3
2
 Rebuke
2
Rebuke
2
 2
2
 Ride the Wind
1
2
Ride the Wind
1
2
 Spinning Axe
3
Spinning Axe
3
 2
2
 Switcheroo
1
2
Switcheroo
1
2
 Tideturner
2
2
Tideturner
2
2
 Treasure Hunter
3
2
Treasure Hunter
3
2
 Draven, Vanquisher
1
4
Draven, Vanquisher
1
4
 Kai'Sa, Survivor
2
4
Kai'Sa, Survivor
2
4
 Noxus Hopeful
3
4
Noxus Hopeful
3
4
 Darius, Trifarian
3
5
Darius, Trifarian
3
5
 Brynhir Thundersong
2
6
Brynhir Thundersong
2
6
 Ferrous Forerunner
2
6
Ferrous Forerunner
2
6
How to Play
Champion
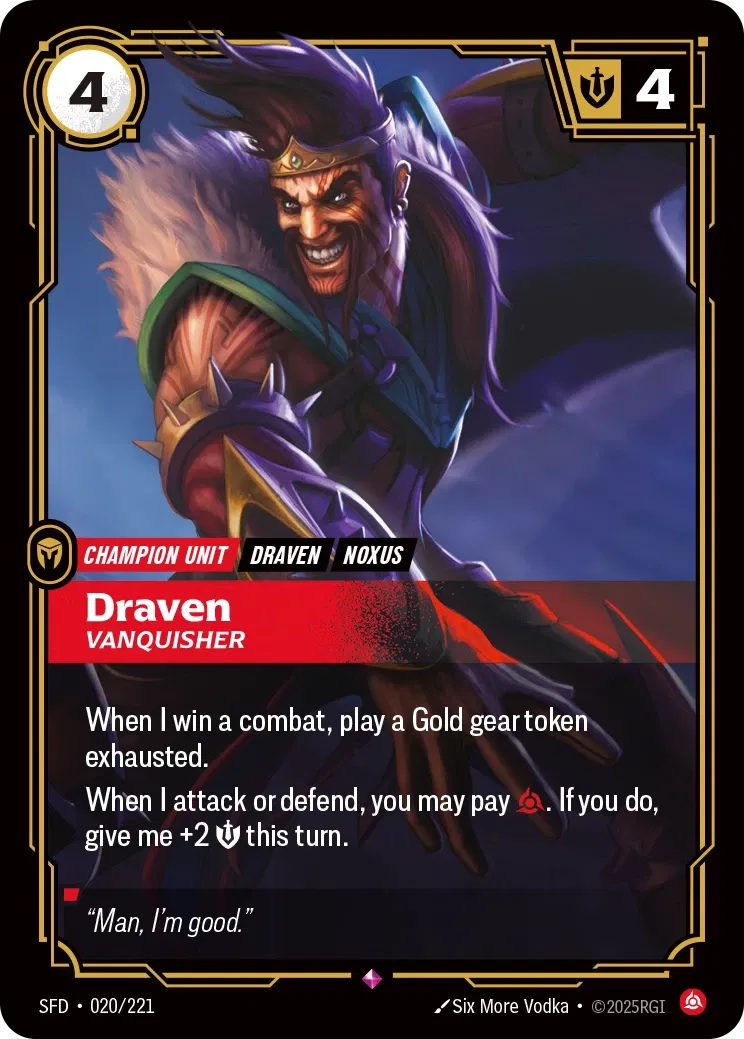
The 4-cost Draven Vanquisher is our chosen champion. He comes in with 4 Might and, just like our Legend, he rewards us for winning combat. Whenever Draven Vanquisher wins a combat, we get to play a Gold gear exhausted, which we can later remove instead of recycling a Rune. This is huge, as it lets us make stronger plays in future turns without deramping our Runes as often.
Draven Vanquisher excels on both offense and defense, giving us the option to recycle a Fury Rune at the start of combat to gain +2 Might. Since this choice is made before combat begins, it becomes a matchup- and situation-dependent decision; we only pull the trigger when that extra Might actually matters, as recycling a Fury Rune will slow our upcoming turn. Keep in mind that we can remove a Gold gear to activate Draven’s +2 Might ability, so we don’t weaken our upcoming turn.
Because of this, your opponent often has to deal with what is effectively a 6 Might Draven whenever he attacks or defends. That makes him much harder to remove through combat and forces opponents to either commit extra resources or find alternative ways to deal with Draven.
Battlefields
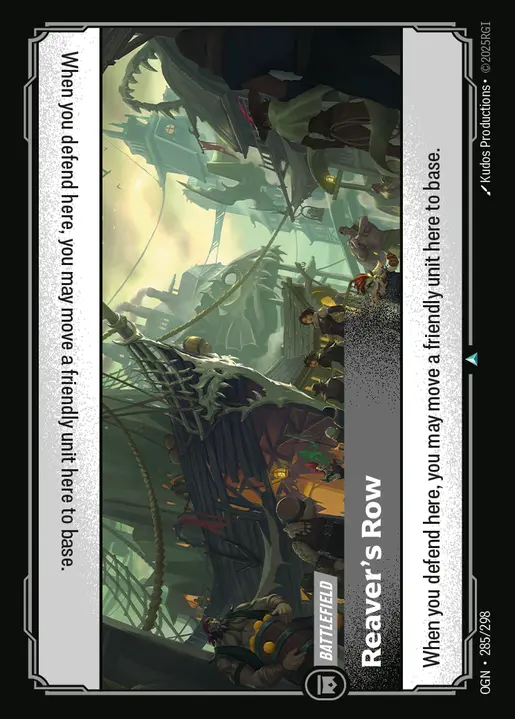
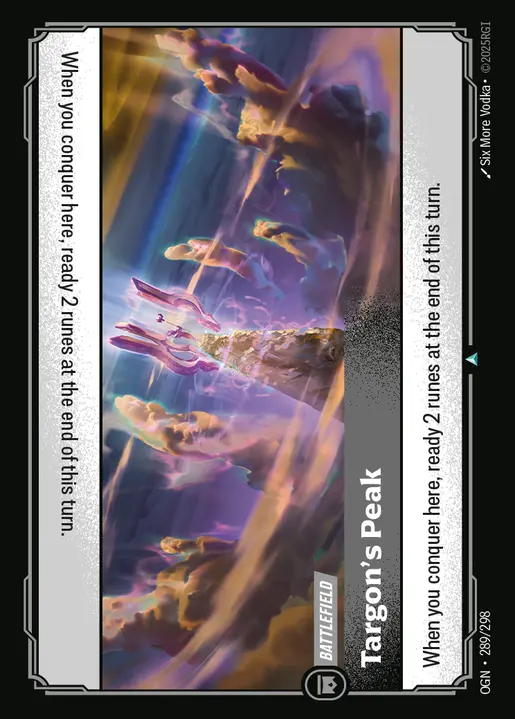
On the first turn, when we’re going in blind, we usually want to choose Targon’s Peak or Reaver’s Row. Reaver’s Row is a strong choice to get access to keep out units alive from attackers, whereas Targon’s Peak gives us additional Energy to use during defensive turns. So it heavily depends on the matchup, but Reaver’s Row is the safer choice going first, unless it’s a mirror.
Conquering Targon's Peak gives us 2 Runes at the end of the turn, keeping pressure on the opponent with threats like Spinning Axe and Fight or Flight that they always have to respect.
That said, we only get those 2 Runes if we conquer the battlefield, setting them to Ready. Because of that, timing matters. We don’t always want our first attack to be on this battlefield if we don’t actually need the extra Runes yet. Instead, it can be correct to attack the other battlefield and wait for a later turn, when those 2 Runes will matter more and can be used during the opponent’s turn.
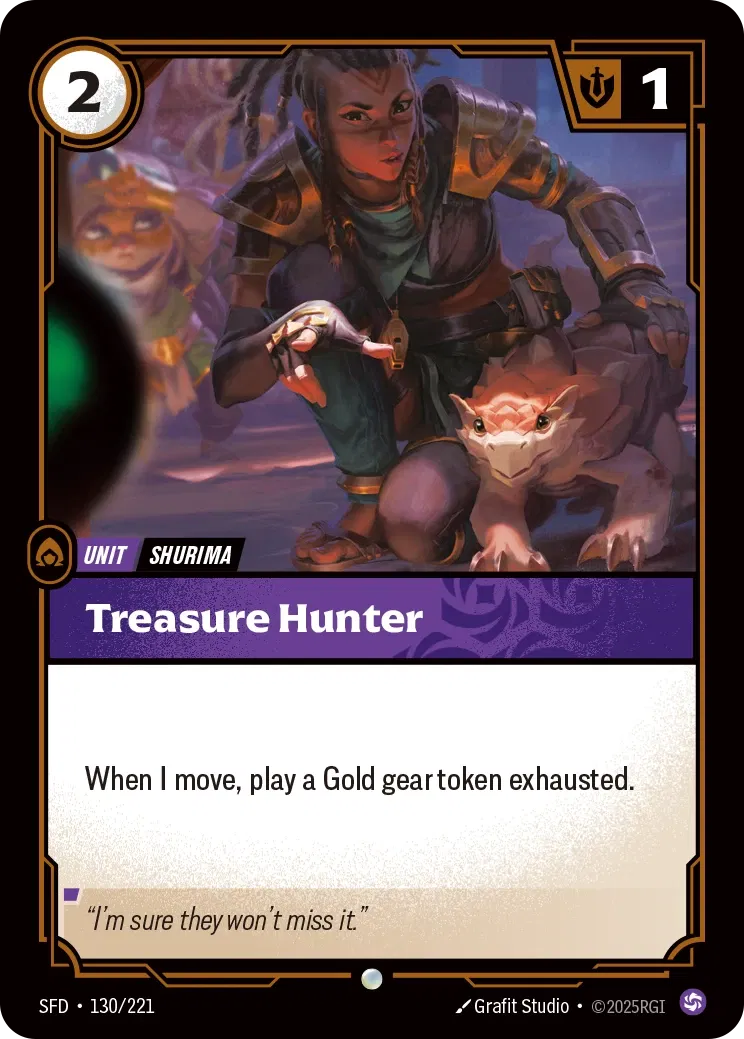
Reaver’s Row is a good choice when we’re going blind or first. When your opponent attacks the Reaver’s Row battlefield, you can choose to return one of your units from that battlefield back to your hand, saving it from dying in combat. This lets you protect key units in otherwise losing fights, and it works perfectly with Treasure Hunter, since moving her back allows you to play a Gold.
Your opponent can also use Reaver’s Row to save their own unit, but rules-wise, you are still considered the winner of the combat. That’s important, because it triggers value engines like Draven Glorious Executioner and Draven Vanquisher, letting you come out ahead even when both players pull units back.
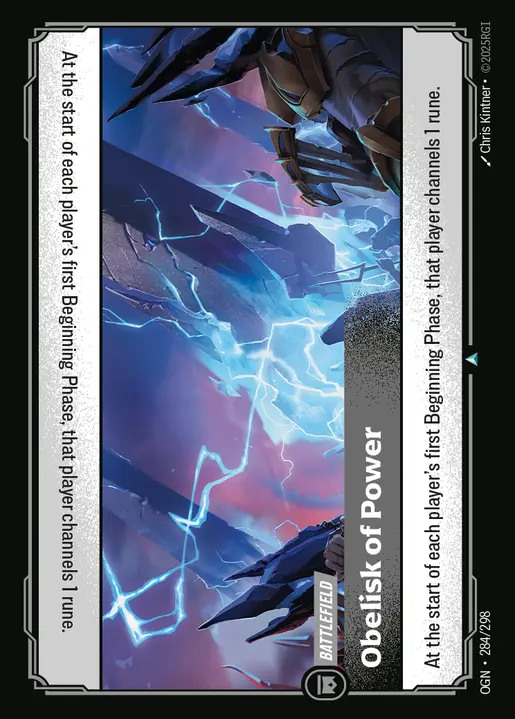
We’ll play Obelisk of Power when we’re going second. You’re channeling 1 Rune to both players, but it fixes our turn 1 play, letting us play Draven on turn 1 and start planning aggressive attack turns with him. We can also go for a wider board with Noxus Hopeful if we have a 2-cost unit to play first.
If you’re not a fan of Obelisk of Power, you can instead go for Treasure Hoard. Since a lot of our cards are even cost, Treasure Hoard makes sense when we expect to go second, as we might have 1 open Rune left we can use to gain a Gold Token.
2-cost Units
Treasure Hunter is perfect in the early game, especially with Reaver’s Row battlefield. When Treasure Hunter moves, you get to play an exhausted Gold. This means with Reaver’s Row, the action of moving her back to base will not only save her, but will also give us a Gold token. Treasure Hunter being only 1 Might makes her pretty weak to any low-cost attack, so in most cases, she won’t survive for long, but will at least give us some value, and then our next attacker (likely Draven Vanquisher) will be ready to reconquer the battlefield.
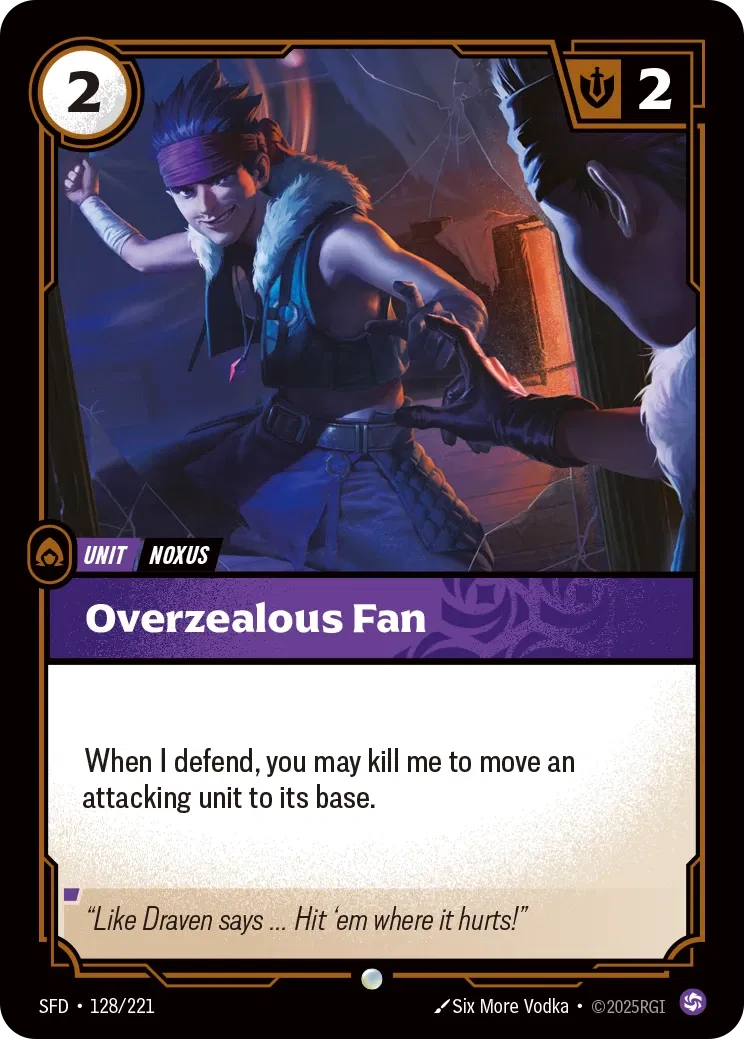
Overzealous Fan fits perfectly in this deck, as his ability synergizes with our Legend and helps us win combat. When Overzealous Fan defends a battlefield, you choose at the start of combat whether or not to sacrifice him to activate his ability. If you do, you get to return one of the opponent’s attackers back to base, weakening or even completely shutting down their attack.
On his own, Overzealous Fan mainly stops the opponent from scoring a point (if they’re attacking with one unit). But when he’s defending alongside another unit, things get much better. You’re now very likely to win the combat, which triggers your Legend’s ability to draw a card while also keeping your other unit safe from being killed, thanks to Overzealous Fan returning a strong attacker to the base.
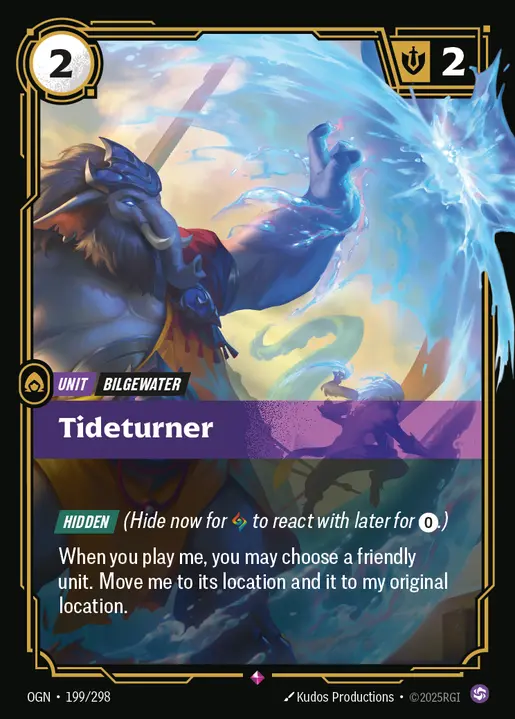
As for Tideturner, he’s a 2 Might unit with a really flexible ability that plays differently depending on the game state. When played, Tideturner lets you swap places with a unit at another location. He also has the Hidden keyword, letting us bypass the 2 Energy cost by hiding him at a battlefield and potentially flipping a combat in our favor.
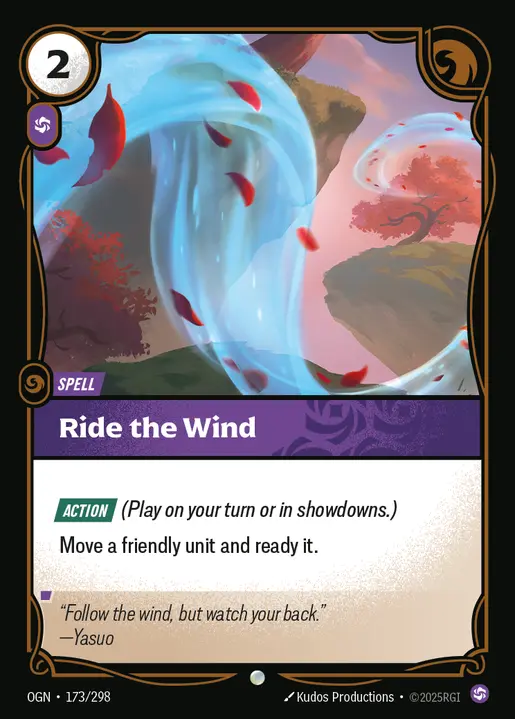
In the early game, Tideturner is a fine development play if we don’t have other 2-cost options. Later on, though, he really shines by opening up some creative lines. You can swap Tideturner (when hidden) with a stronger unit while defending, making it much harder for your opponent to win that combat. You can also play Tideturner to base, swap him with a Ready unit at a battlefield, then use that unit to attack a different battlefield and go for a conquer.
Another strong line is swapping Tideturner with Overzealous Fan while you’re being attacked. This turns Overzealous Fan into the defender, letting you trigger his ability and bounce one of the opponent’s attackers back to base.
Going Wider
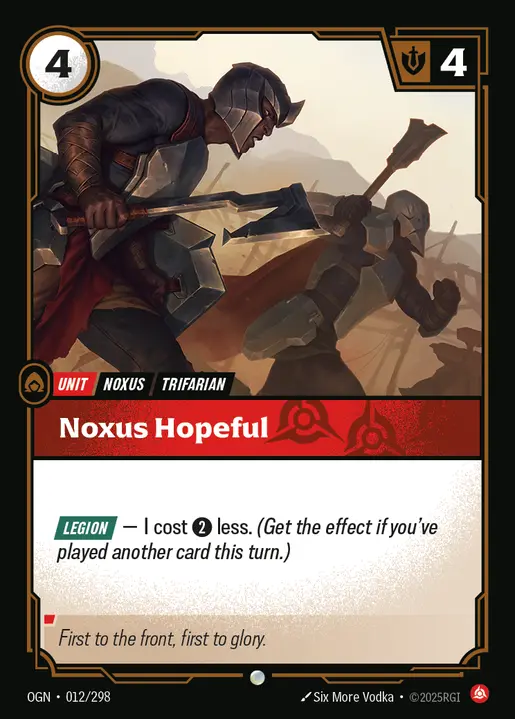
Noxus Hopeful is a 4-cost, 4 Might unit that becomes a 2-cost unit if you activate its Legion keyword. It’s a great way to develop a powerful unit for less Energy commitment, especially in the early game, helping you overwhelm the opponent and put them behind on the board.
Aggressors
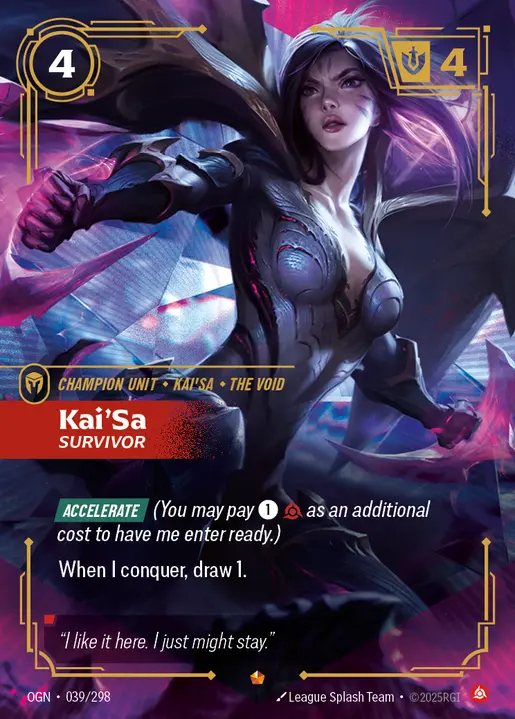
Kai’Sa Survivor is a 4-cost, 4 Might unit that can join in Ready through her Accelerate keyword if you pay an additional 1 Energy and Recycle a Fury Rune. She’s perfect if you need an immediate attack to conquer a battlefield, earning you a draw through her ability to gain more resources that will help shape your later stages of the game.
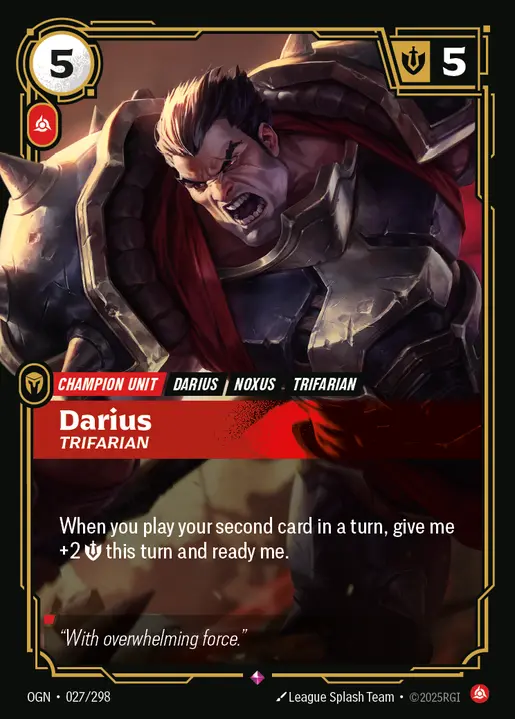
Darius is a straight-up powerhouse in this deck and can easily act as a mid- to late-game win condition. He’s a 5 Might unit with an ability that lets him become Ready when you play your second card each turn, while also gaining +2 Might. This means you can attack with him on the turn he’s played, setting up aggressive lines to conquer a battlefield.
Since Darius can trigger this ability once per turn, he can make two moves in a single turn. If Darius is already Ready in base at the start of your turn, you can attack with him first to conquer a battlefield, then play two cards and Ready him, letting you move him back to base. This makes it much harder for your opponent to remove him. If Darius is already holding a battlefield, you can move him back to base, play two cards to Ready him, then swing into another battlefield and potentially conquer that one as well.
The +2 Might boost only lasts for the turn, so you’ll lose it during your opponent’s turn. However, if you manage to play two cards on your opponent’s turn, you can regain that +2 Might, which can be crucial for winning combat or getting out of range of a removal card. One important note: activating a Hidden card counts as playing a card, so it does contribute toward triggering Darius’s ability.
Late Game
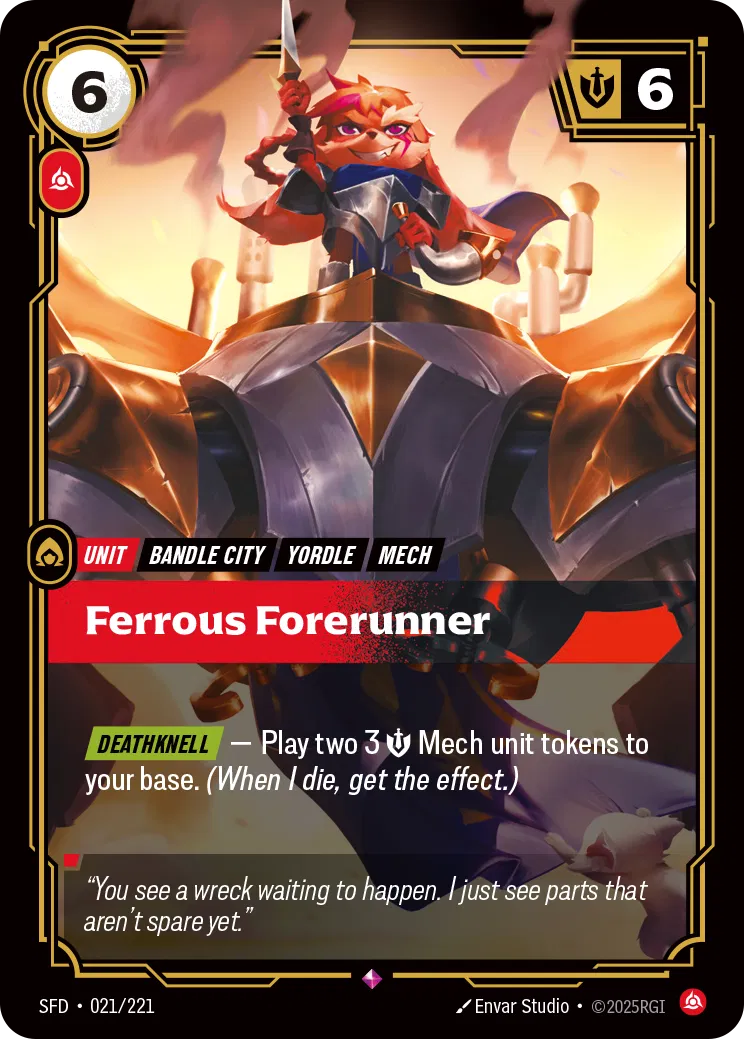
Ferrous Forerunner is the pesky unit we rely on to maintain board presence. He’s a 6 Might unit that, when killed, lets you play two 3 Might Mech units to your base, ensuring you’re still applying pressure even after he goes down. You’re forcing the opponent to spend real resources to deal with Ferrous Forerunner, only for his Deathknell to leave you with even more bodies on the board.
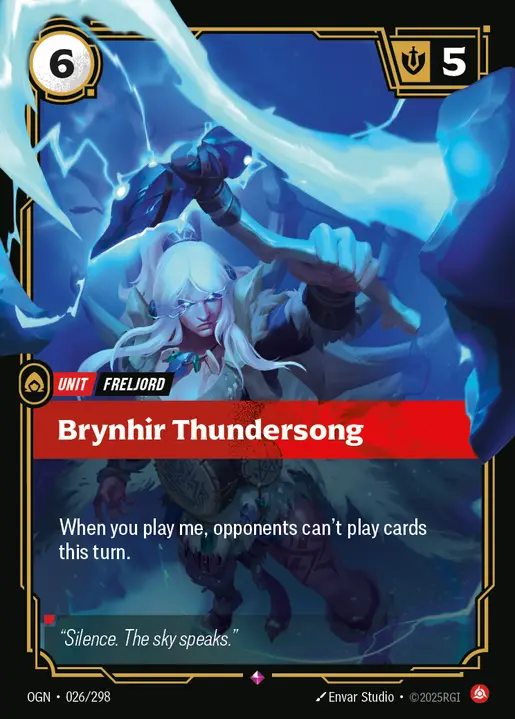
Brynhir Thundersong has gained a lot of popularity in the Spiritforged meta, mainly as a way to stop opponents from holding a battlefield using cards in hand or Hidden plays. When played, Brynhir Thundersong’s ability prevents the opposing player from playing any cards for the rest of the turn, meaning once you start committing attacks, they’re forced to just sit and watch.
Since Brynhir Thundersong’s ability goes on the stack, your opponent does get a window to respond with Reaction-speed spells before it resolves. In some situations, they’ll fire off whatever they can to protect their units ahead of time.
If you’re sitting at 6 or 7 Points and looking to conquer both battlefields to close out the game, Brynhir Thundersong is an excellent tool to shut down any last-ditch attempts from your opponent to stop you.
Equipment
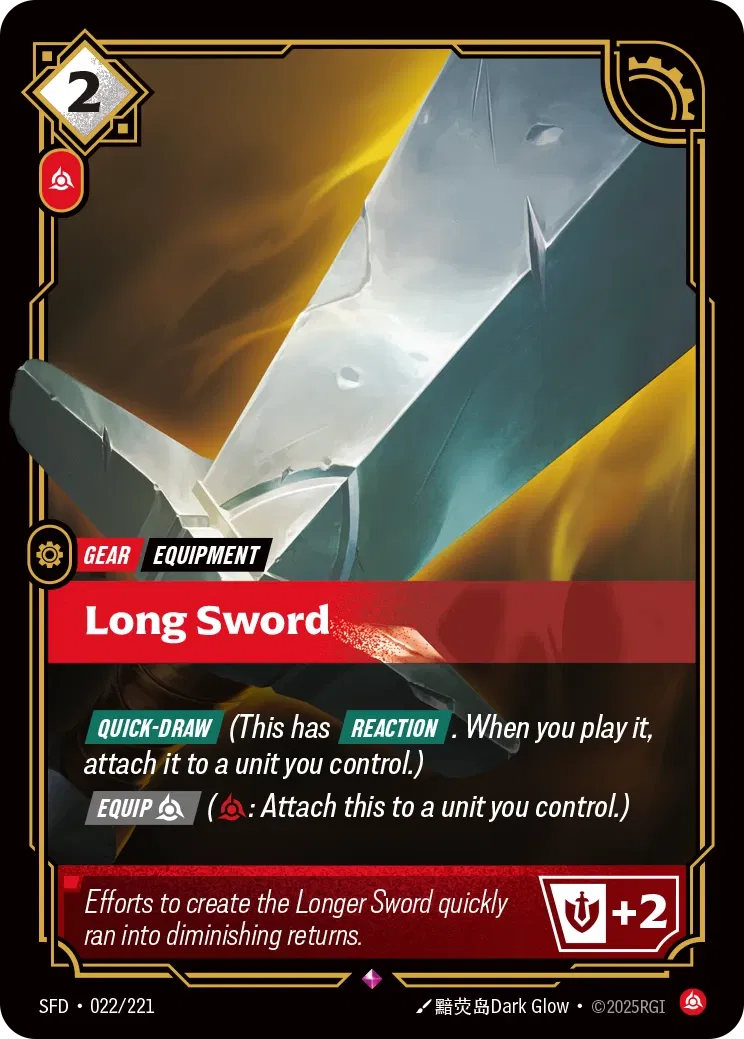
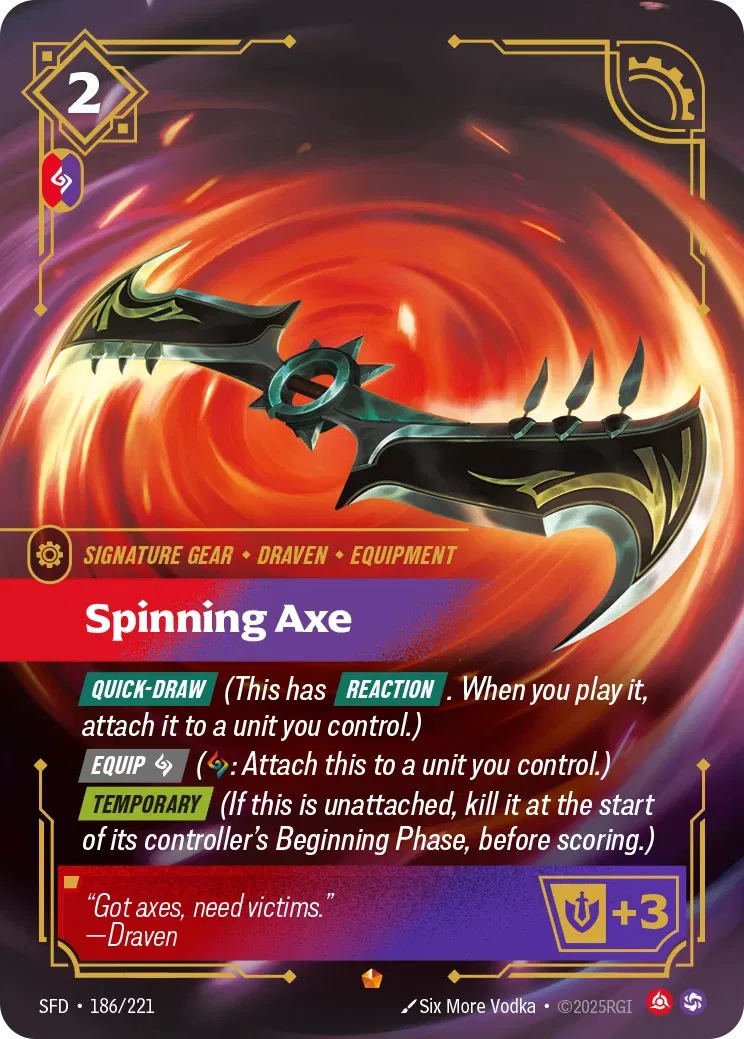
Spinning Axe and Long Sword are equipment with the Quick-Draw keyword, meaning whenever we have 2 Energy open, we’re threatening to equip them at Reaction speed to one of your units, potentially shutting down the opponent’s ability to kill our unit. Spinning Axe is giving us a +3 Might boost, so it’s more threatening than Long Sword, but if our equipped unit dies on the opponent’s turn, we’ll be losing Spinning Axe to its Temporary keyword since we can’t attach it to another unit.
The +3 Might from Spinning Axe is especially strong with units like Draven and Kai’Sa, since it puts them at 7 Might, saving them from damage spells like .
Might Boost Aggression
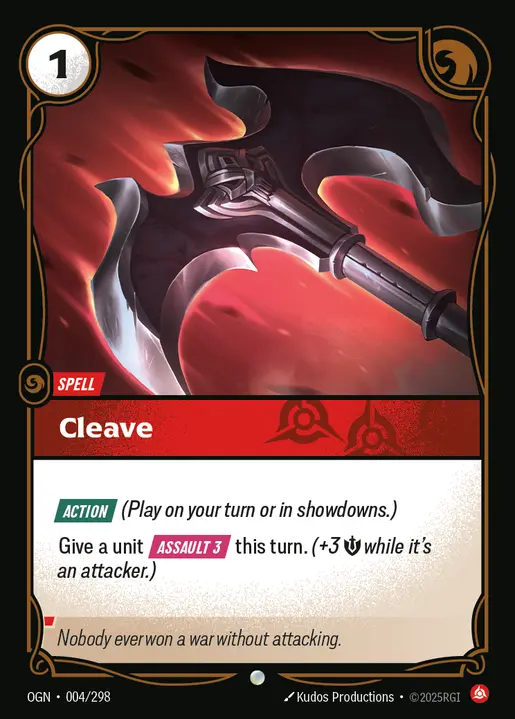
Cleave is a low-cost spell we can use for added aggression, giving one of your units a +3 Assault, letting us kill stronger units on the battlefield and potentially conquer it.
Removal Spell
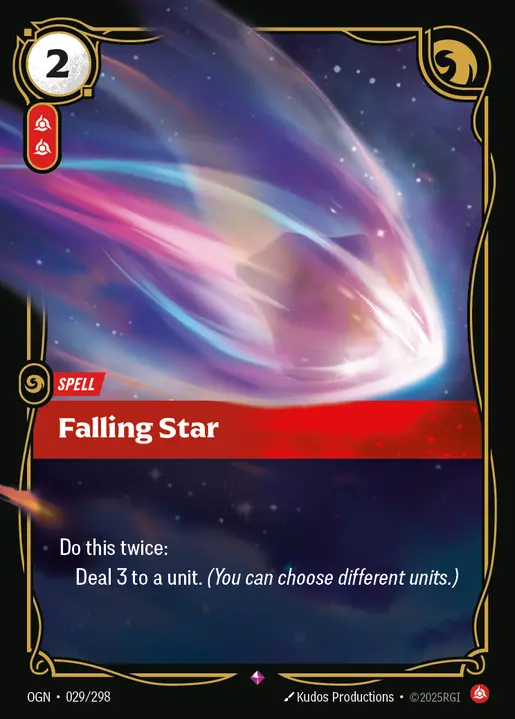
Falling Star is a massive damage spell, letting you deal 3 damage twice, even to the same unit. So you’re dealing up to 6 damage to a unit, and the Power cost being 2 Fury runes can be daunting, but with Treasure Hunter and Draven Vanquisher, we’re getting Gold tokens that can mitigate the recycle cost.
Battlefield Control
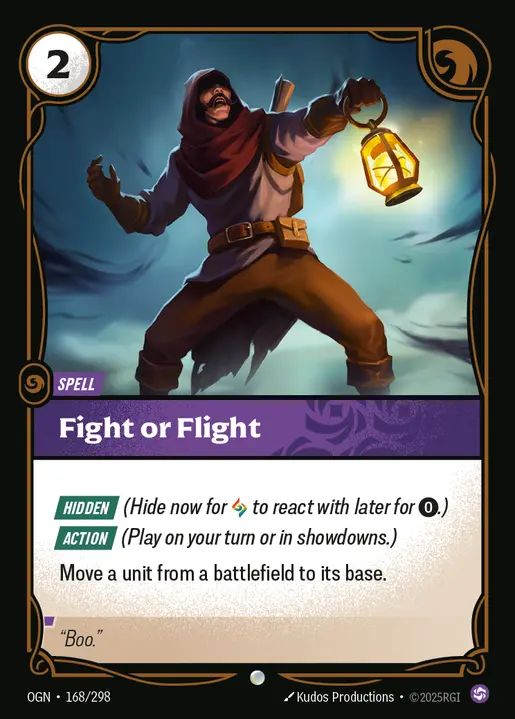
Fight or Flight is one of your strongest control tools, letting you either remove one of your opponent’s units from a battlefield or bounce your own unit to save it from attackers or, in some cases, removal spells. When played, you choose a unit at a battlefield and move it back to base. Fight or Flight can also help us win combat by returning one of the opponent’s attackers to base, weakening their overall push. Even if they’re attacking with just a single unit, using Fight or Flight (when needed) still counts as a won combat, which in turn triggers our Legend’s ability and draws us a card.
It’s an Action spell with the Hidden keyword. This means you can’t use it as a direct response to a removal spell or ability that specifically targets a battlefield. However, when played Hidden, you can use it at Reaction speed to protect your unit.
You do have to recycle a Rune to play it Hidden, but skipping the 2 Energy cost and potentially playing around removal like Hidden Blade can often prevent you from falling behind on board.
Fight or Flight can also be used aggressively in the right spots. If you have a Ready unit at a battlefield, you can return it to base, then attack another battlefield. This can swing the game, pick off opposing units, and score you a point.
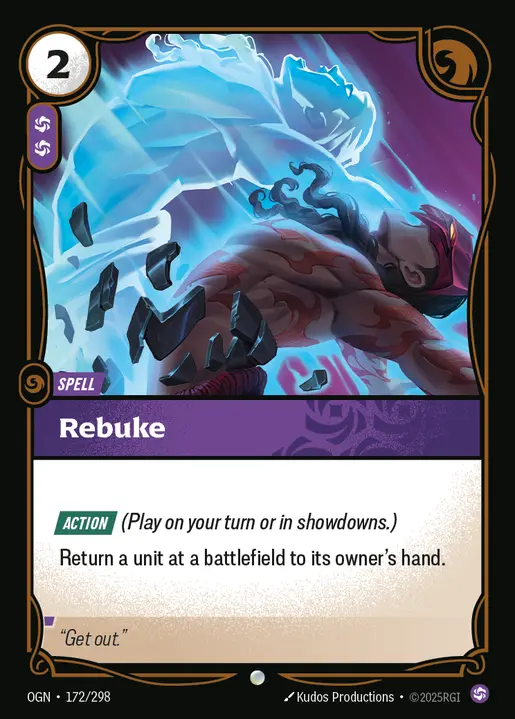
As for Rebuke, it’s a 2 Energy, 2 Chaos Power Action spell that returns a unit to its owner’s hand. This puts your opponent behind on tempo by removing a key unit they rely on to pressure the board, forcing them to spend Energy to replay it. The result is a massive slowdown, making it much harder for them to catch back up.
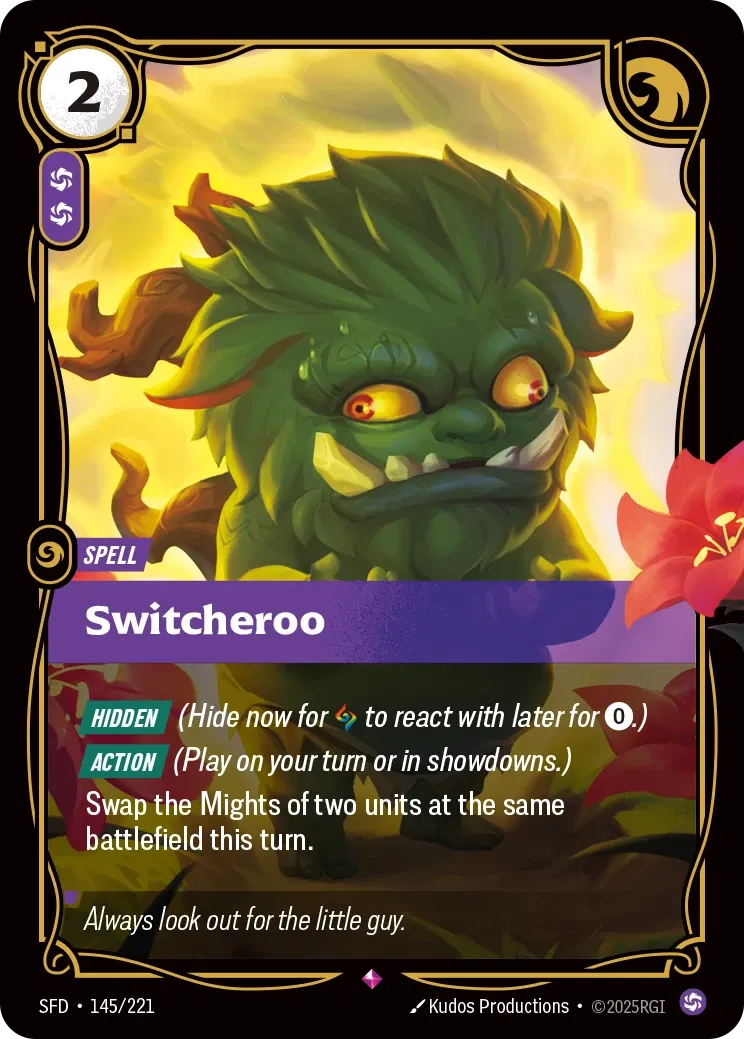
Switcheroo is an Action spell that lets you swap the Might values of two units on the same battlefield. You’ll usually want to line this up when your opponent is attacking with a higher-Might unit, switching it with one of your lower-Might units like Treasure Hunter. This can swing a combat in your favor, help you hold a battlefield, or even be used offensively to conquer one.
Returning 2 Chaos Runes can be expensive, so we generally avoid casting Switcheroo straight from hand unless it’s late-game or we’re forced into it. Instead, we can take advantage of the Hidden keyword, hiding it at a battlefield and waiting for the opponent to commit an attack, effectively bypassing the 2 Energy and 2 Chaos Power cost.
Counter Spell
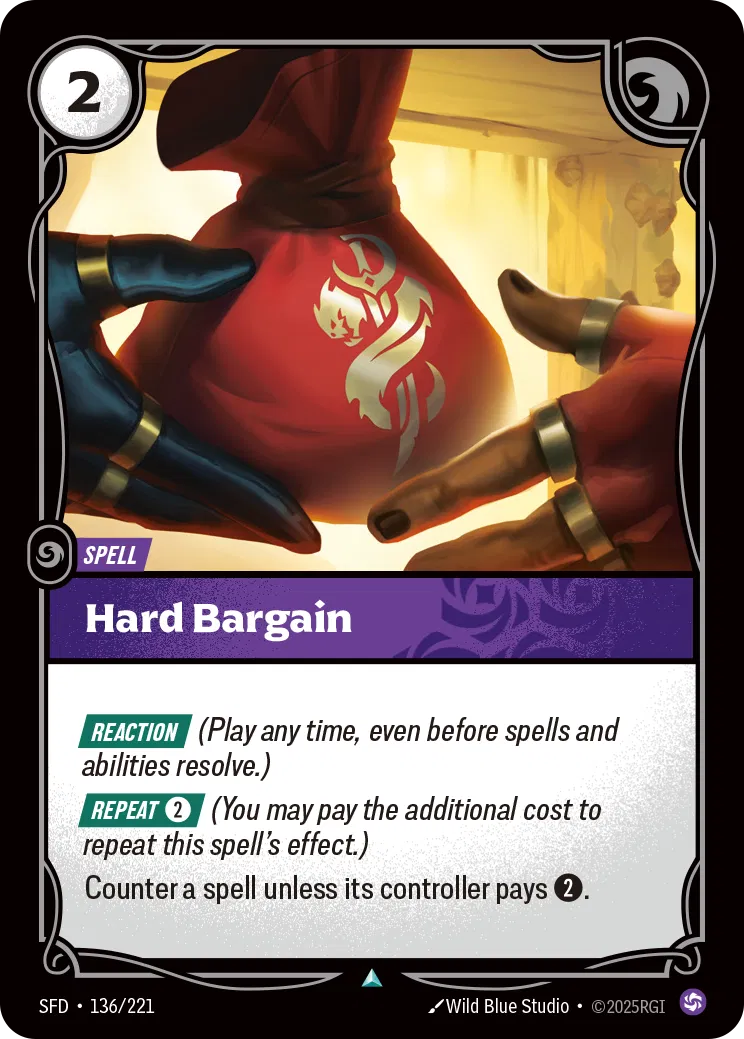
Hard Bargain can come in clutch to stop an opponent’s spell from resolving. Your opponent can pay 2 Energy to shut it down, but if you repeat Hard Bargain, they’re now forced to pay 4 Energy instead. In many cases, especially against high-cost spells, that extra tax is too much, leaving your opponent unable to pay, and their spell is shut off.
You can add more copies of Hard Bargain to your sideboard, and if you’re up against a heavy spell oritected deck, for example, against Kai’Sa, you can swap them in after game 1.
Other Cards to Include/Sideboard
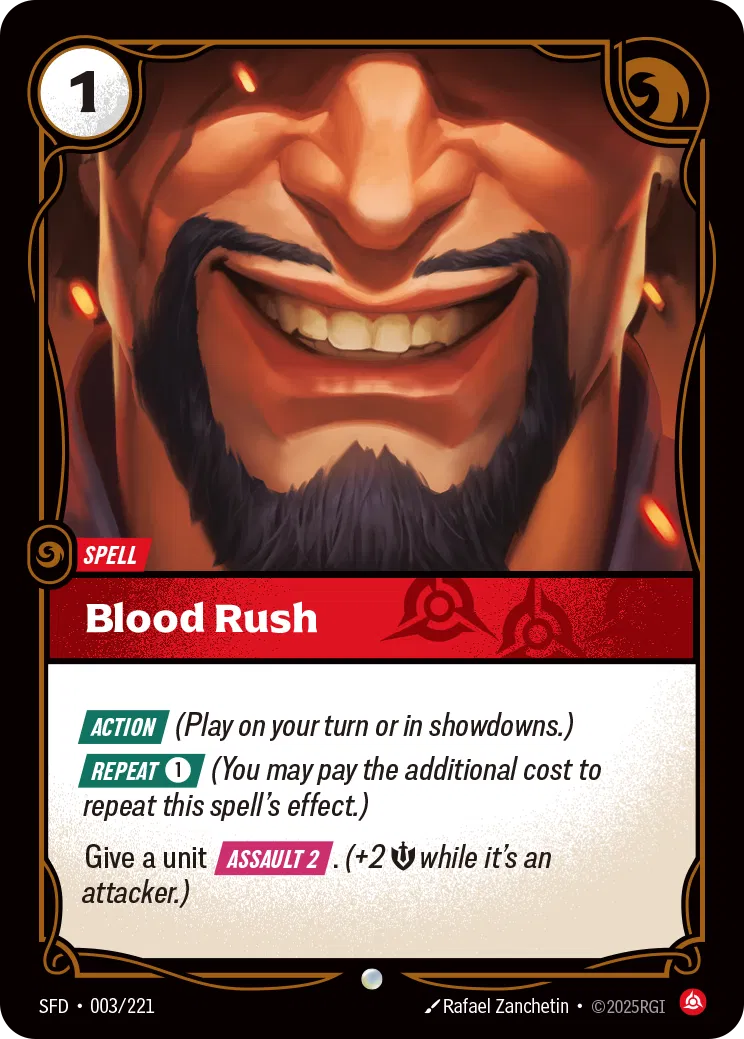
- If you’re not a fan of Cleave, you can swap it out for Blood Rush. It’s a 1-cost spell that gives one of your units Assault 2, enabling strong aggressive turns. You can also repeat it to grant another Assault 2, either stacking it on the same unit or spreading it across multiple attackers.
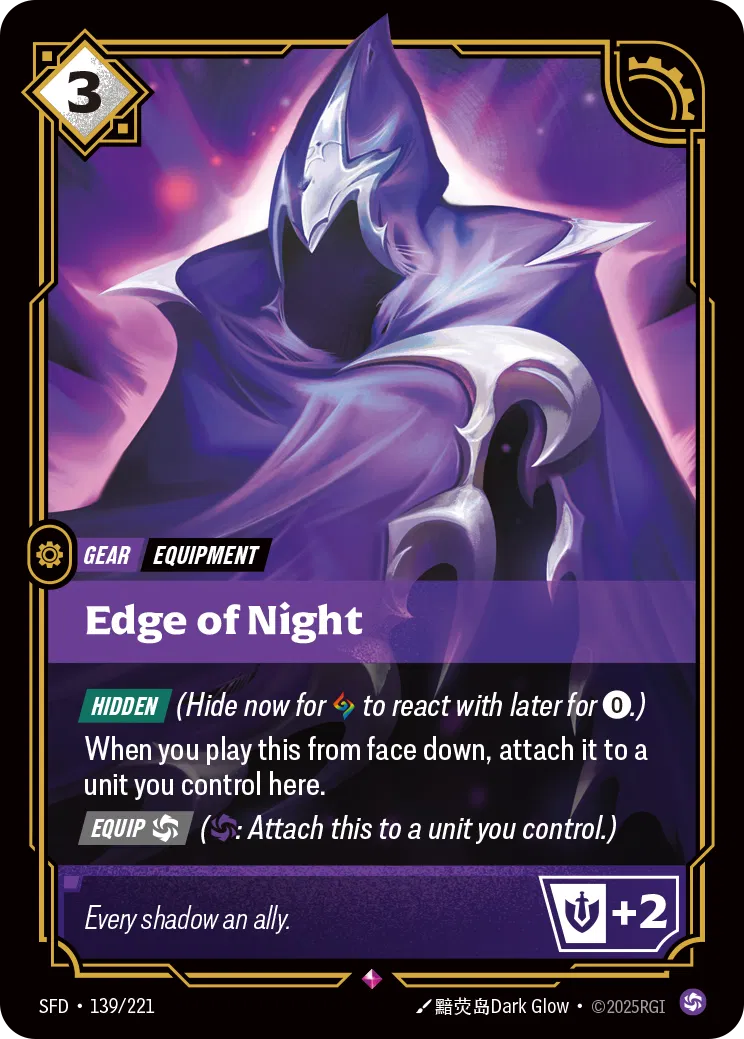
- We’re seeing some players include Edge of Night in their lists, mainly to hide it at a battlefield and then reveal it whenever you need to give one of your units a +2 Might boost. It’s a cheap way to play an equipment, dodging the 2 Energy cost.
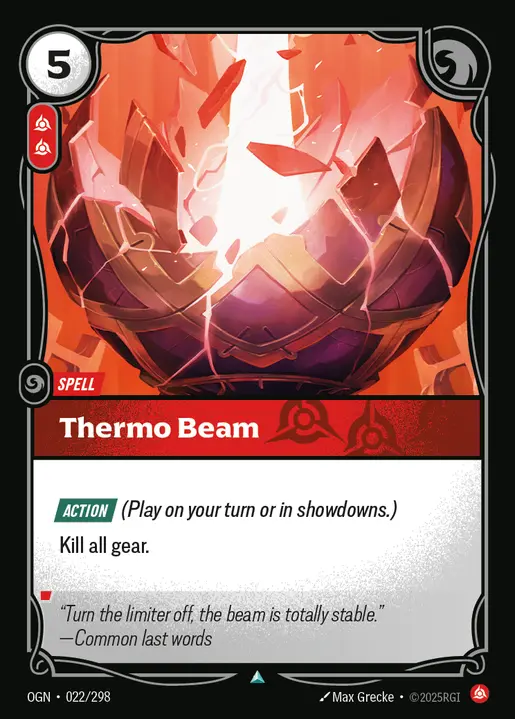
- Thermo Beam is a sideboard card if you’re expecting decks that heavily rely on Gears as part of their strategy. Getting to kill all Gears can shut down the opponent’s strategy and put them behind in the game.
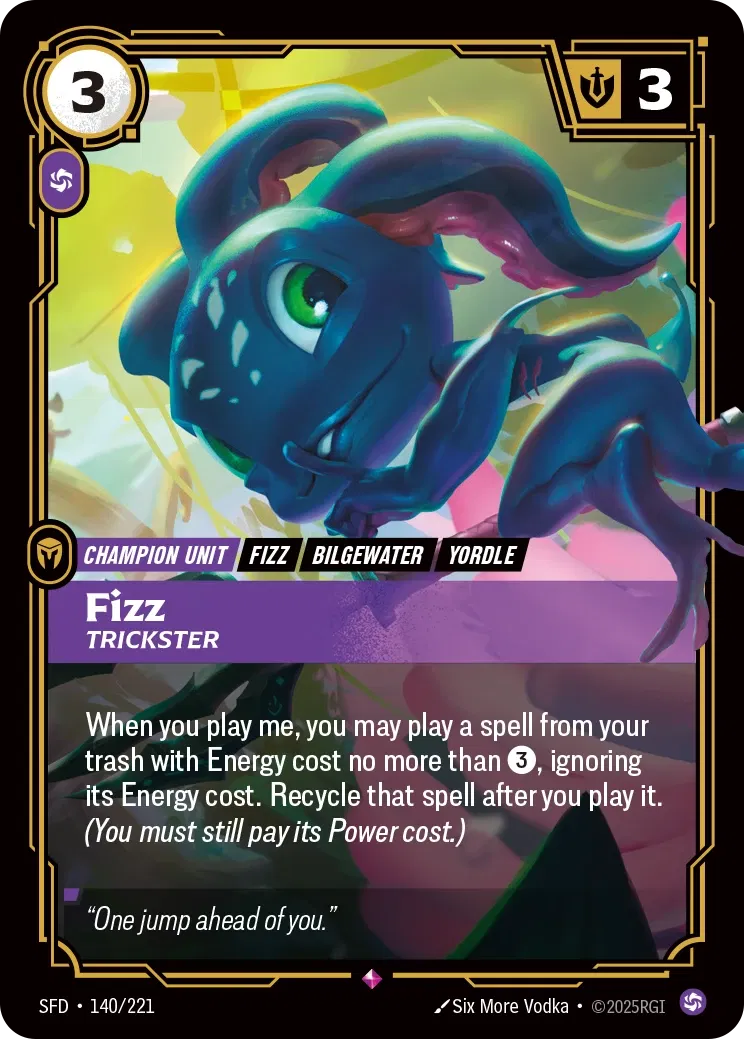
- Fizz Trickster is a consideration to add to the main deck as he’s a value card that you can play later in the game. All your spells are low-cost, so Fizz can play them from his trash. Notebly, you’ll be going for cards like Falling Star or Rebuke for board control.
Mircale Draven Decklist
Draven, Glorious Executioner
1
0
Fury Rune
4
0
Chaos Rune
8
0
Targon's Peak
1
0
 Zaun Warrens
1
0
Zaun Warrens
1
0
 Minefield
1
0
Minefield
1
0
 Called Shot
3
0
Called Shot
3
0
 Seal of Discord
3
0
Stacked Deck
3
1
Seal of Discord
3
0
Stacked Deck
3
1
 Bushwhack
1
2
Falling Star
1
2
Fight or Flight
2
2
Overzealous Fan
2
2
Rebuke
2
2
Bushwhack
1
2
Falling Star
1
2
Fight or Flight
2
2
Overzealous Fan
2
2
Rebuke
2
2
 Scrapheap
3
2
Scrapheap
3
2
 Traveling Merchant
3
2
Treasure Hunter
3
2
Traveling Merchant
3
2
Treasure Hunter
3
2
 Vi, Destructive
1
2
Vi, Destructive
1
2
 Ezreal, Prodigy
3
3
Fizz, Trickster
2
3
Ezreal, Prodigy
3
3
Fizz, Trickster
2
3
 Last Rites
1
3
Draven, Vanquisher
1
4
Last Rites
1
3
Draven, Vanquisher
1
4
 Battering Ram
3
5
Battering Ram
3
5
 Rhasa the Sunderer
3
10
Rhasa the Sunderer
3
10
How to Play
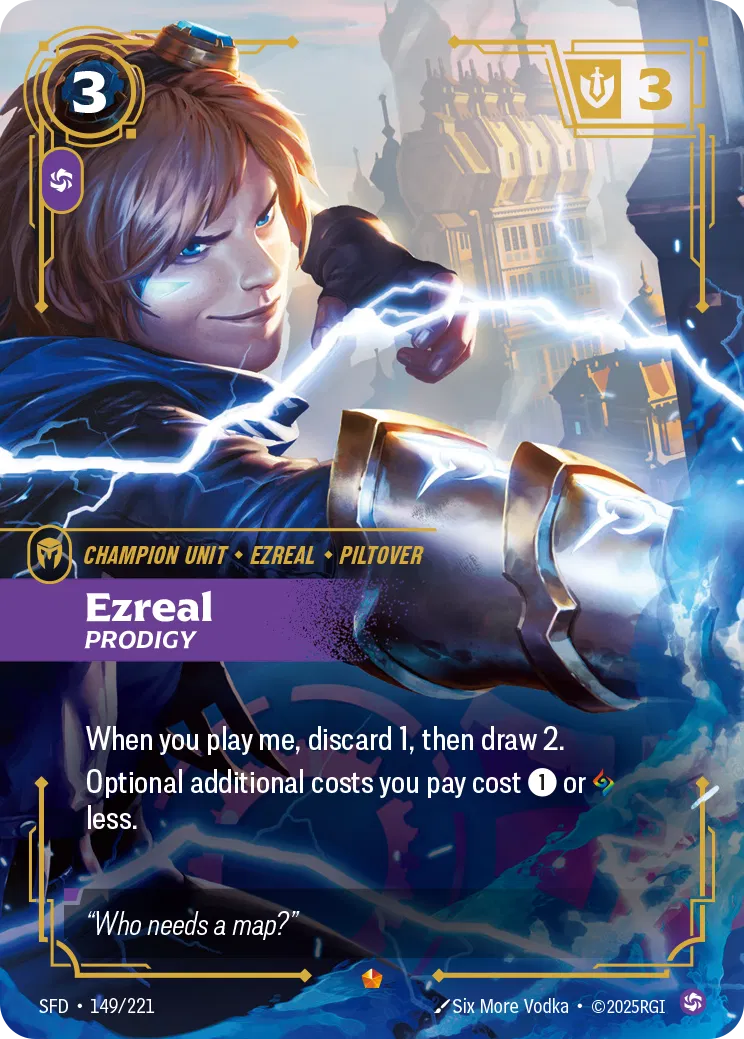
The Miracle Draven has insane draw potential, capable of going through most of the deck to find the cards it needs. The general game plan is to have Ezreal on the board to reduce the cost of your Repeated spells, making it less taxing to repeat cards like Called Shot. We want to play a lot of low-cost cards during our turn, reducing the cost of Battering Ram and Rhasa the Sunderer and start flooding the board with high Might units.
Battlefields
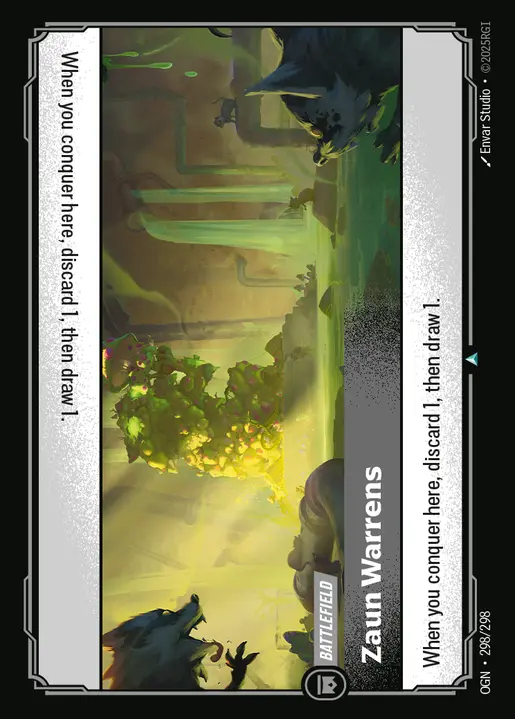
Zaun Warrens fits perfectly in our deck as we want to get more cards in our trash for Rhasa the Sunderer. It also makes it even easier for us to discard Scrapheap from hand.
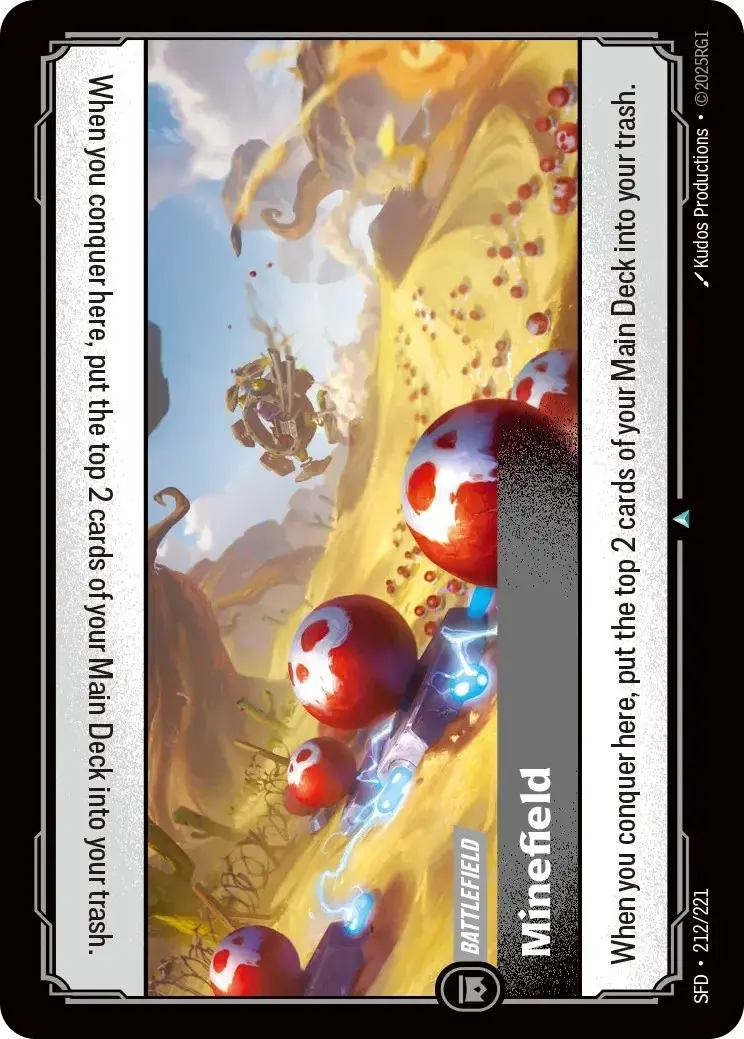
Minefield is mainly for filling up our trash with cards, speeding up our Rhasa the Sunderer turn. It usually doesn’t benefit the opposing player at all, unless they too are relying on their trash as part of their strategy.
Seal
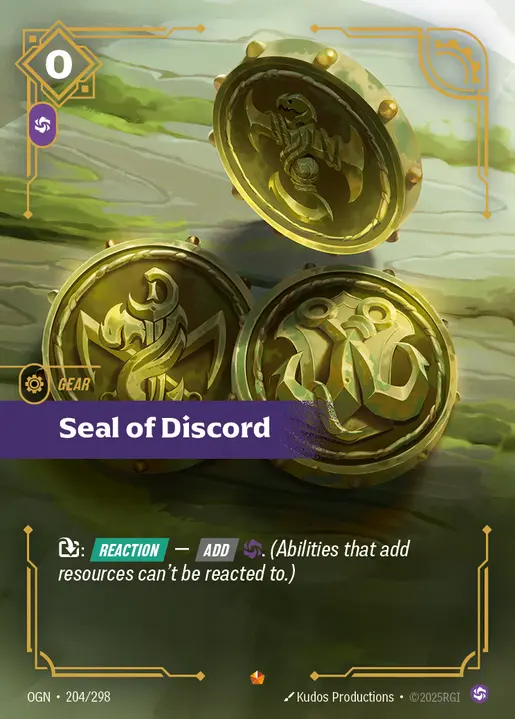
Seal of Discord is a must to make reduce the Chaos recycling we’re doing for the rest of the game. The deck has a lot of Chaos Recycling, and Seal of Discord makes sure we continue making meaningful plays without putting us behind on future turns.
Discard Cards
Ezreal is a key card for this deck to function, as it makes it easier for you to commit more plays without having to pay as much cost on optional additional costs. When played, Ezreal lets you discard a card from hand to draw two cards, adding more resources to your hand and helping fill up your trash to reduce the cost of Rhasa the Sunderer.
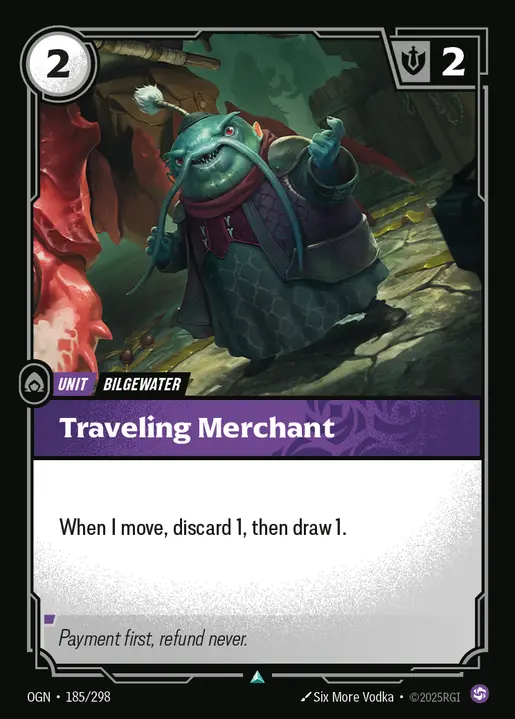
Traveling Merchant is another way we can discard cards from our hand to filter for better cards and add more cards in the trash. Scrapheap is the best option to trash as it automically draws you a card when trashes, adding even more resources in your hand for better future plays.
Consistency
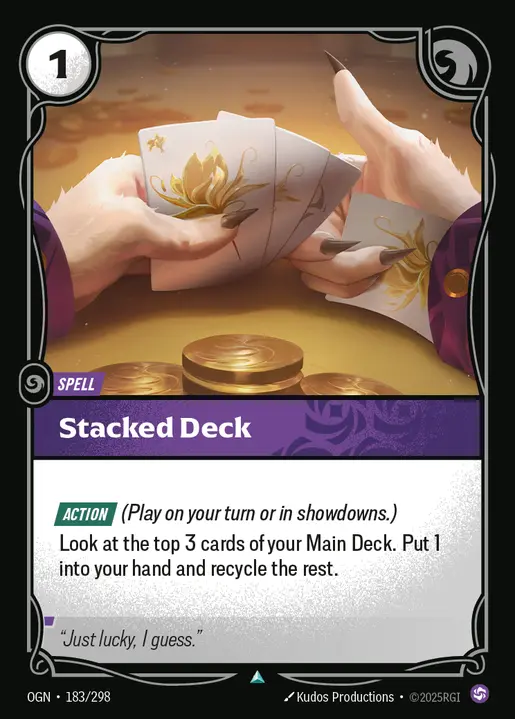
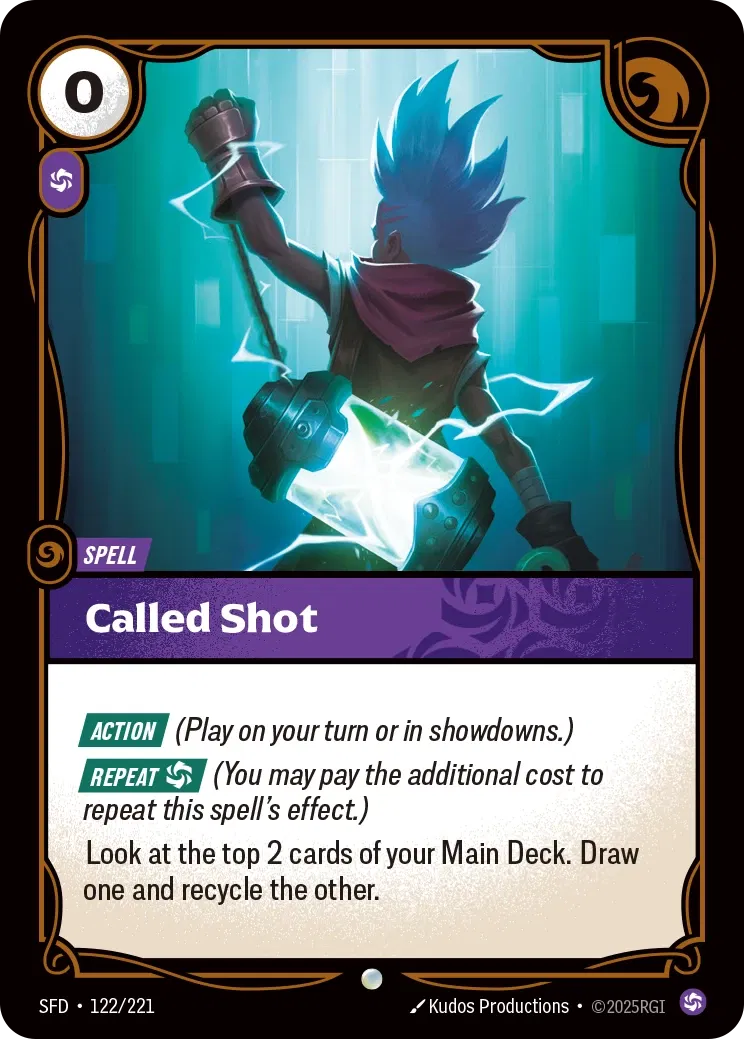
Called Shot and Stacked Deck add more consistency to our deck, helping us find the cards we need to continue our strategy while also easily adding cards to our trash. We always want to Repeat Called Shot, so having Ezreal in play will make sure we dodge the second Chaos Power cost from the repeat, and getting to look at the top cards of our deck to draw one of them.
They’re perfect to add more consistency to your deck, helping you find your combo plays and set up for a powerful turn to overwhelm the opposing player.
We don’t instantly play these cards as they’re cheap spells that can be used later in the game to find something specific you need, depending on the state of the game or to combo with Battering Ram and start reducing their costs.
Fizz Value
Fizz is a great value play, especially in the later stages of the game. When played, you get to play a spell with a cost of 3 Energy or less. We can play cards like Called Shot, Falling Star, Rebuke, or even Bushwhack for the aggressive turn.
Cost Reduction Win Conditions
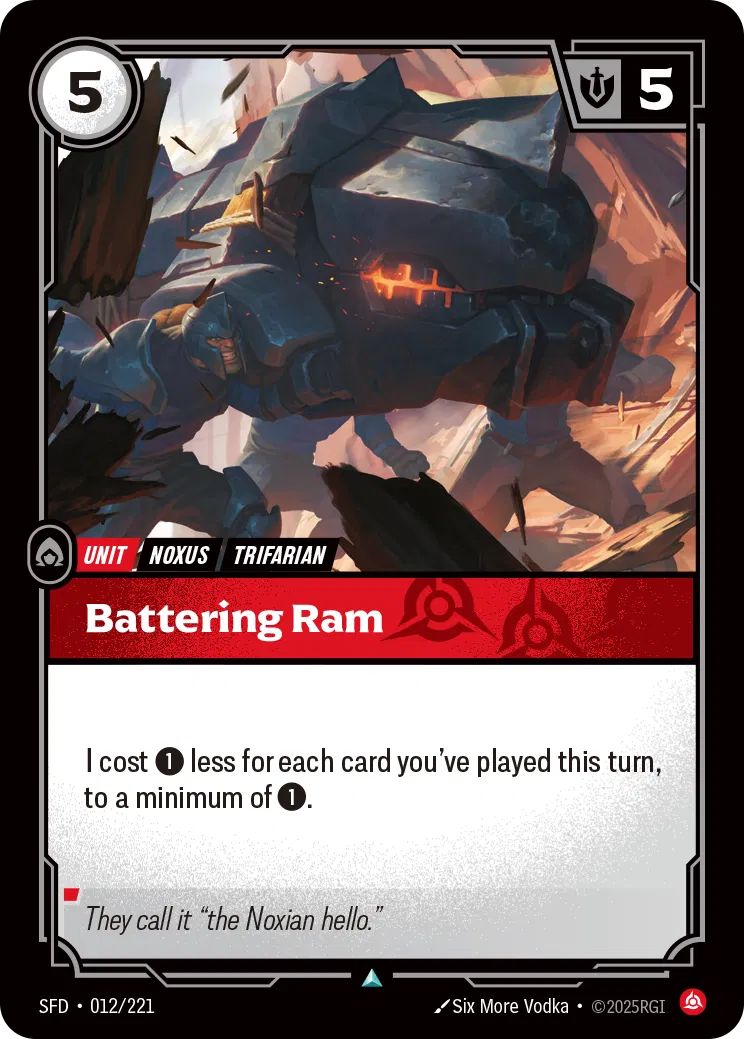
For every card you play, Battling Ram’s cost will be reduced by 1 to a minimum of 1. So the ideal turn is to play 4 cards and start dropping 1-cost Rams on the board to overwhelm the opposing player. Cards like Called Shot, Seal of Chaos, and Stacked Deck are cheap spells to play that can reduce the cost of Battling Ram to a point where you can play it for 1 or 2 Energy.
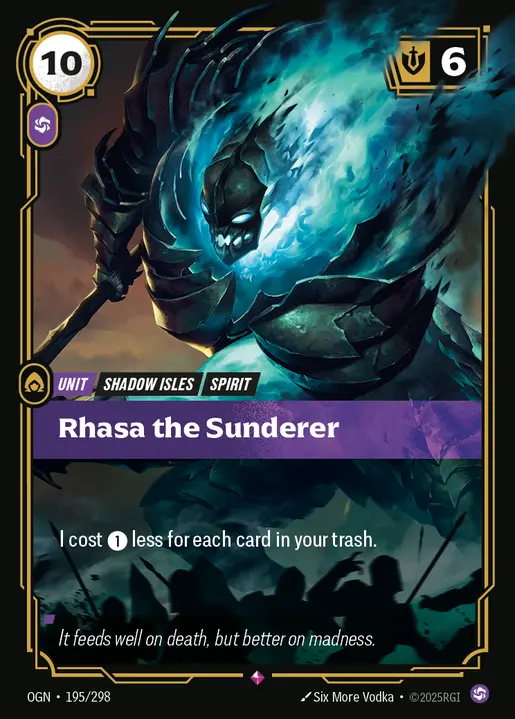
As for Rhasa the Sunderer, his cost is reduced by 1 for each card you have in the trash, and can go to 0 Energy. If you have 10 cards in your trash, you’ll only be paying the Chaos Power cost when dropping your Rhasa. Multiple 6 Might units for no Energy cost can set up an explosive upcoming turn that can be too difficult for the opposing player to keep up with.
Shovel Value
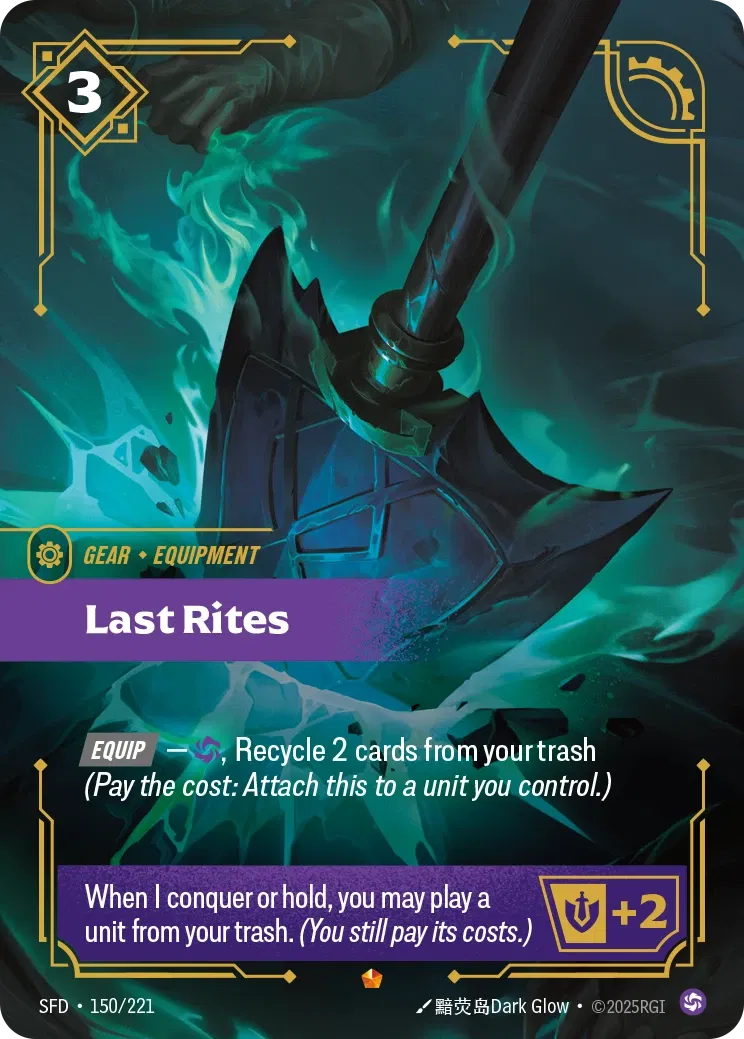
Last Rites is a 3-cost equipment that we can attach for 1 Chaos Power and recyling 2 cards. We usually want to recycle cards we won’t need in the trash and if we go through all of our deck, we want to draw into them later on. When you conquer or hold a battlefield, Last Rites lets you play a unit from your trash, but you have to pay its cost to do so.
This isn’t an issue for us since in the later stages of the game, Rhasa will be 0 Energy so he’s the perfect unit to develop from the trash. In some cases, we’ll opt to get Fizz from the trash to get access to a spell. This will depend on the state of the game and which unit we value more over the other.
Last Rites is perfect for slow matchups, ensuring you don’t run out of steam and can outvalue the opposing player if they don’t have an answer for your equipment.
Alternate Win Condition
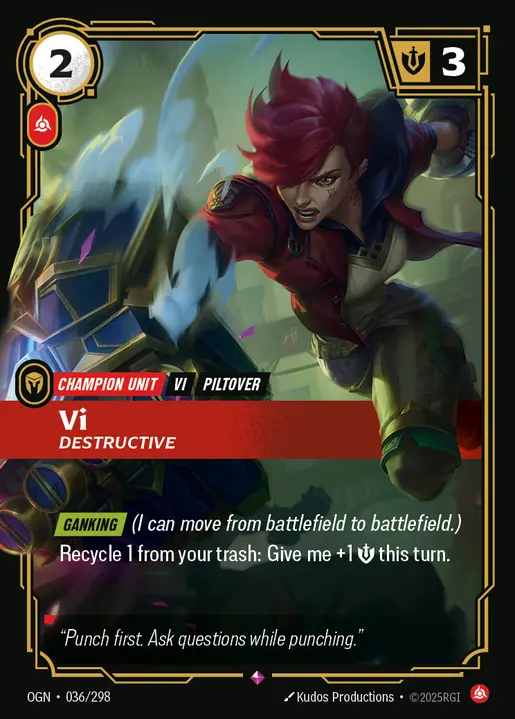
Vi can become a heavy hitter, gaining 1 Might for every spell in your trash you recycle to your main deck. We want to recycle cards we don’t need in the trash and we’re hoping we can get to them later in the game through our draws and searcher cards. Recycling cards can be important in slow games, where you’re drawing a lot of cards and you don’t want to deck out.
Aggressive Turn
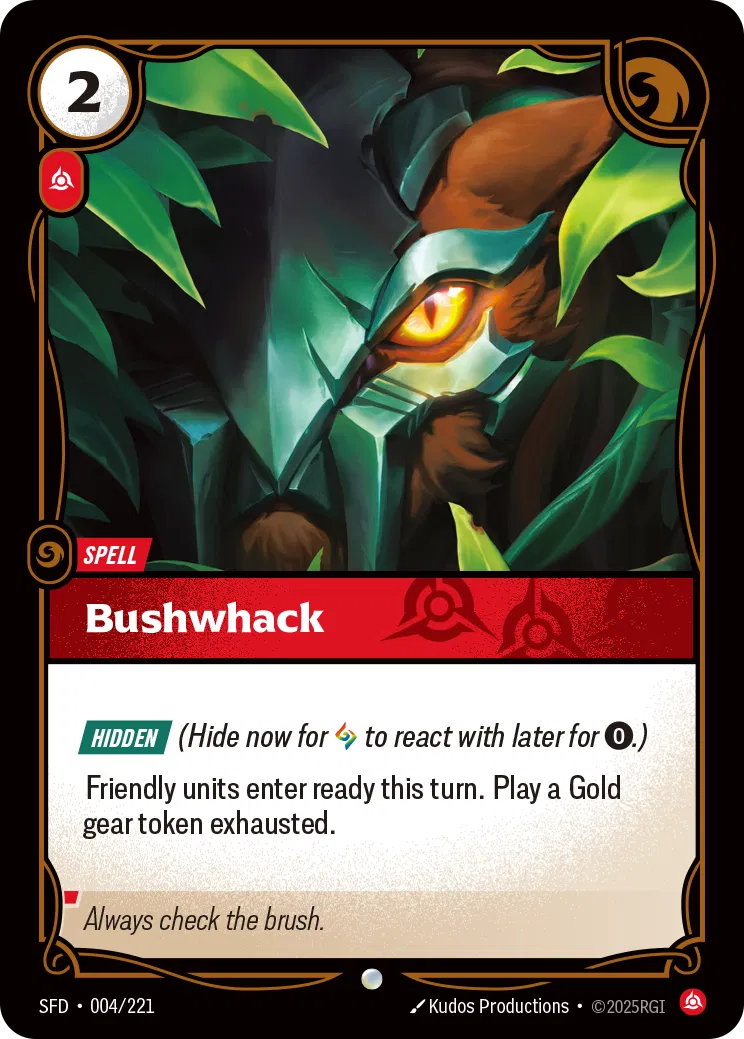
Bushwhack is a late-game win condition, as all units played for the rest of the turn enter Ready. The main combo is pairing Bushwhack with Vi, letting her come in Ready and immediately attack the turn she’s played. It’s also great with low-cost units like Rhasa and Battering Ram, which hit the board Ready and immediately threaten to swing.
You can play Bushwhack straight from hand or hide it at a battlefield to dodge the Energy cost. If you do choose to hide it, keep in mind that your opponent can clear that battlefield, forcing you to either activate or discard the spell.
Fizz can also cast Bushwhack from the trash, so if you draw it early, it’s often a dead card. In those cases, you’re happy discarding it with cards like Ezreal or Travelling Merchant, then letting Fizz bring it back later when it actually matters.
Closing Words
Draven has been crushing the competitive scene so far, and both lists are incredibly strong in the Spiritforged meta. In terms of popularity, the midrange build is currently the go-to for most players, but we’re still seeing plenty of Miracle Draven decks popping up—especially from players who favor the Ezreal line.
That’s it from me! If you found this guide helpful, consider supporting us on Metafy!